Week 8.2 Recap Everything, Build PayTM Backend
In this lecture, Harkirat guides us through an end-to-end tutorial on building a comprehensive full-stack application resembling Paytm While there are no specific notes provided for this section, a mini guide is outlined below to assist you in navigating through each step of the tutorial. Therefore, it is strongly advised to actively follow along during the lecture for a hands-on learning experience.
It’s important to note that this session primarily focuses on the backend section of the application. For the frontend portion, be sure to check out the content covered in the subsequent 8.4 lecture.
Step 1 - What are we building, Clone the starter repo
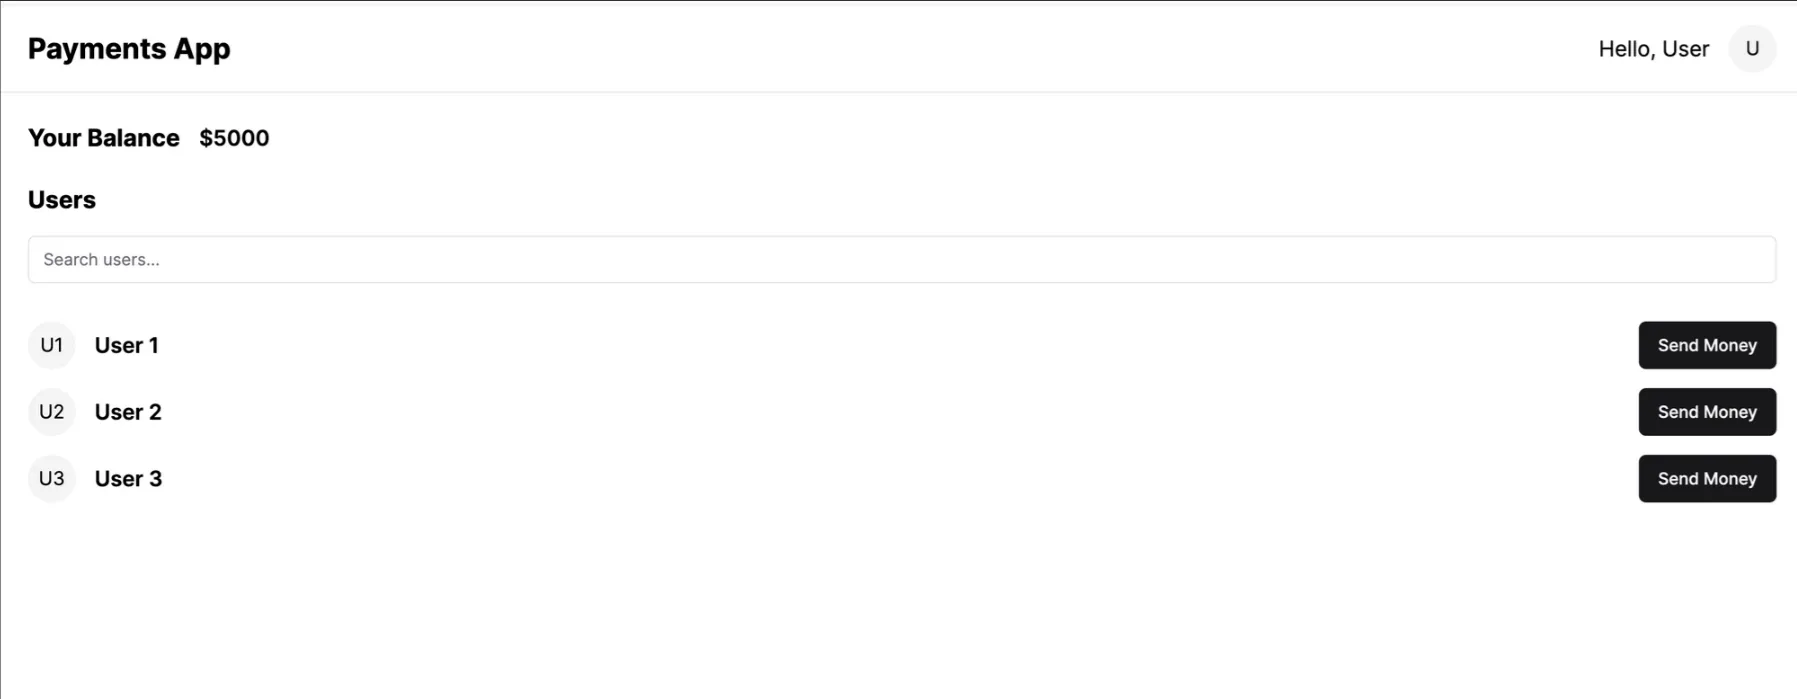
We’re building a PayTM like application that let’s users send money to each other given an initial dummy balance
Things to do
Clone the 8.2 repository from https://github.com/100xdevs-cohort-2/paytm
git clone https://github.com/100xdevs-cohort-2/paytm💡
Please keep a MongoDB URL handy before you proceed. This will be your primary database for this assignment
- Create a free one here - https://www.mongodb.com/
- There is a Dockerfile in the codebase, you can run mongo locally using it.
Explore the repository
The repo is a basic express + react + tailwind boilerplate
Backend
- Express - HTTP Server
- mongoose - ODM to connect to MongoDB
- zod - Input validation
const express = require("express");const app = express();Frontend
- React - Frontend framework
- Tailwind - Styling framework
function App() {
  return (    <div>        Hello world    </div>  )}
export default App
Step 2 - User Mongoose schemas
We need to support 3 routes for user authentication
- Allow user to sign up.
- Allow user to sign in.
- Allow user to update their information (firstName, lastName, password).
To start off, create the mongo schema for the users table
- Create a new file (db.js) in the root folder
- Import mongoose and connect to a database of your choice
- Create the mongoose schema for the users table
- Export the mongoose model from the file (call it User)
Solution
Simple solution
const mongoose = require('mongoose');
// Create a Schema for Usersconst userSchema = new mongoose.Schema({    username: String,    password: String,    firstName: String,    lastName: String});
// Create a model from the schemaconst User = mongoose.model('User', userSchema);
module.exports = {  User};
Elegant Solution
const mongoose = require('mongoose');
// Create a Schema for Usersconst userSchema = new mongoose.Schema({    username: {        type: String,        required: true,        unique: true,        trim: true,        lowercase: true,        minLength: 3,        maxLength: 30    },    password: {        type: String,        required: true,        minLength: 6    },    firstName: {        type: String,        required: true,        trim: true,        maxLength: 50    },    lastName: {        type: String,        required: true,        trim: true,        maxLength: 50    }});
// Create a model from the schemaconst User = mongoose.model('User', userSchema);
module.exports = {  User};
Step 3 - Create routing file structure
In the index.js file, route all the requests to /api/v1 to a apiRouter defined in backend/routes/index.js
Step 1
Create a new file backend/routes/index.js that exports a new express router.
( How to create a router - https://www.geeksforgeeks.org/express-js-express-router-function/ )
Solution
const express = require('express');
const router = express.Router();
module.exports = router;
Step 2
Import the router in index.js and route all requests from /api/v1 to it
Solution
const express = require("express");const rootRouter = require("./routes/index");
const app = express();
app.use("/api/v1", rootRouter);
Step 4 - Route user requests
1. Create a new user router
Define a new router in backend/routes/user.js and import it in the index router.
Route all requests that go to /api/v1/user to the user router.
Solution
const express = require('express');
const router = express.Router();
module.exports = router;
2. Create a new user router
Import the userRouter in backend/routes/index.js so all requests to /api/v1/user get routed to the userRouter.
Solution
const express = require('express');const userRouter = require("./user");
const router = express.Router();
router.use("/user", userRouter)
module.exports = router;
Step 5 - Add cors, body parser and jsonwebtoken
1. Add cors
Since our frontend and backend will be hosted on separate routes, add the cors middleware to backend/index.js
Hint
Look at https://www.npmjs.com/package/cors
Solution
const express = require('express');const cors = require("cors");
app.use(cors());
const app = express();
module.exports = router;
2. Add body-parser
Since we have to support the JSON body in post requests, add the express body parser middleware to backend/index.js
You can use the body-parser npm library, or use express.json
Hint
https://medium.com/@mmajdanski/express-body-parser-and-why-may-not-need-it-335803cd048c
Solution
const express = require('express');const cors = require("cors");const rootRouter = require("./routes/index");
const app = express();
app.use(cors());app.use(express.json());
app.use("/api/v1", rootRouter);
3. Add jsonwebtoken
We will be adding authentication soon to our application, so install jsonwebtoken library. It’ll be useful in the next slide
npm install jsonwebtoken4. Export JWT_SECRET
Export a JWT_SECRET from a new file backend/config.js
Solution
module.exports = { JWT_SECRET: "your-jwt-secret"}5. Listen on port 3000
Make the express app listen on PORT 3000 of your machine
Solution
... Existing code
app.listen(3000);
Step 6 - Add backend auth routes
In the user router (backend/routes/user), add 3 new routes.
1. Signup
This route needs to get user information, do input validation using zod and store the information in the database provided
- Inputs are correct (validated via zod)
- Database doesn’t already contain another user
If all goes well, we need to return the user a jwt which has their user id encoded as follows -
{ userId: "userId of newly added user"}💡
Note - We are not hashing passwords before putting them in the database. This is standard practise that should be done, you can find more details here - https://mojoauth.com/blog/hashing-passwords-in-nodejs/
Method: POST Route: /api/v1/user/signup Body:
{ username: "name@gmail.com", firstName: "name", lastName: "name", password: "123456"}Response:
Status code - 200
{ message: "User created successfully", token: "jwt"}Status code - 411
{ message: "Email already taken / Incorrect inputs"}Solution
const zod = require("zod");const { User } = require("../db");const jwt = require("jsonwebtoken");const { JWT_SECRET } = require("../config");
const signupBody = zod.object({    username: zod.string().email(),  firstName: zod.string(),  lastName: zod.string(),  password: zod.string()})
router.post("/signup", async (req, res) => {    const { success } = signupBody.safeParse(req.body)    if (!success) {        return res.status(411).json({            message: "Email already taken / Incorrect inputs"        })    }
    const existingUser = await User.findOne({        username: req.body.username    })
    if (existingUser) {        return res.status(411).json({            message: "Email already taken/Incorrect inputs"        })    }
    const user = await User.create({        username: req.body.username,        password: req.body.password,        firstName: req.body.firstName,        lastName: req.body.lastName,    })    const userId = user._id;
    const token = jwt.sign({        userId    }, JWT_SECRET);
    res.json({        message: "User created successfully",        token: token    })})
2. Route to sign in
Let’s an existing user sign in to get back a token.
Method: POST Route: /api/v1/user/signin Body:
{ username: "name@gmail.com", password: "123456"}Response:
Status code - 200
{ token: "jwt"}Status code - 411
{ message: "Error while logging in"}Solution
const signinBody = zod.object({    username: zod.string().email(),  password: zod.string()})
router.post("/signin", async (req, res) => {    const { success } = signinBody.safeParse(req.body)    if (!success) {        return res.status(411).json({            message: "Incorrect inputs"        })    }
    const user = await User.findOne({        username: req.body.username,        password: req.body.password    });
    if (user) {        const token = jwt.sign({            userId: user._id        }, JWT_SECRET);
        res.json({            token: token        })        return;    }
    res.status(411).json({        message: "Error while logging in"    })})
By the end, routes/user.js should look like follows
Solution
const express = require('express');
const router = express.Router();const zod = require("zod");const { User } = require("../db");const jwt = require("jsonwebtoken");const { JWT_SECRET } = require("../config");
const signupBody = zod.object({    username: zod.string().email(),  firstName: zod.string(),  lastName: zod.string(),  password: zod.string()})
router.post("/signup", async (req, res) => {    const { success } = signupBody.safeParse(req.body)    if (!success) {        return res.status(411).json({            message: "Email already taken / Incorrect inputs"        })    }
    const existingUser = await User.findOne({        username: req.body.username    })
    if (existingUser) {        return res.status(411).json({            message: "Email already taken/Incorrect inputs"        })    }
    const user = await User.create({        username: req.body.username,        password: req.body.password,        firstName: req.body.firstName,        lastName: req.body.lastName,    })    const userId = user._id;
    const token = jwt.sign({        userId    }, JWT_SECRET);
    res.json({        message: "User created successfully",        token: token    })})
const signinBody = zod.object({    username: zod.string().email(),  password: zod.string()})
router.post("/signin", async (req, res) => {    const { success } = signinBody.safeParse(req.body)    if (!success) {        return res.status(411).json({            message: "Email already taken / Incorrect inputs"        })    }
    const user = await User.findOne({        username: req.body.username,        password: req.body.password    });
    if (user) {        const token = jwt.sign({            userId: user._id        }, JWT_SECRET);
        res.json({            token: token        })        return;    }
    res.status(411).json({        message: "Error while logging in"    })})
module.exports = router;
Step 7 - Middleware
Now that we have a user account, we need to gate routes which authenticated users can hit.
For this, we need to introduce an auth middleware
Create a middleware.js file that exports an authMiddleware function
- Checks the headers for an Authorization header
Bearer <token> - Verifies that the token is valid
- Puts the
userIdin the request object if the token checks out. - If not, return a 403 status back to the user
Header -Authorization: Bearer <actual token>Solution
const { JWT_SECRET } = require("./config");const jwt = require("jsonwebtoken");
const authMiddleware = (req, res, next) => {    const authHeader = req.headers.authorization;
    if (!authHeader || !authHeader.startsWith('Bearer ')) {        return res.status(403).json({});    }
    const token = authHeader.split(' ')[1];
    try {        const decoded = jwt.verify(token, JWT_SECRET);
        req.userId = decoded.userId;
        next();    } catch (err) {        return res.status(403).json({});    }};
module.exports = {    authMiddleware}
Step 8 - User routes
1. Route to update user information
User should be allowed to optionally send either or all of
- password
- firstName
- lastName
Whatever they send, we need to update it in the database for the user.
Use the middleware we defined in the last section to authenticate the user
Method: PUT Route: /api/v1/user Body:
{ password: "new_password", firstName: "updated_first_name", lastName: "updated_first_name",}Response:
Status code - 200
{ message: "Updated successfully"}Status code - 411 (Password is too small…)
{ message: "Error while updating information"}Solution
const  { authMiddleware } = require("../middleware");
// other auth routes
const updateBody = zod.object({  password: zod.string().optional(),    firstName: zod.string().optional(),    lastName: zod.string().optional(),})
router.put("/", authMiddleware, async (req, res) => {    const { success } = updateBody.safeParse(req.body)    if (!success) {        res.status(411).json({            message: "Error while updating information"        })    }
    await User.updateOne(req.body, {        _id: req.userId    })
    res.json({        message: "Updated successfully"    })})
2. Route to get users from the backend, filterable via firstName/lastName
This is needed so users can search for their friends and send them money
Method: GET
Route: /api/v1/user/bulk
Query Parameter: ?filter=harkirat
Response:
Status code - 200
{ users: [{ firstName: "", lastName: "", _id: "id of the user" }]}Hints
https://stackoverflow.com/questions/3305561/how-to-query-mongodb-with-like
Solution
router.get("/bulk", async (req, res) => {    const filter = req.query.filter || "";
    const users = await User.find({        $or: [{            firstName: {                "$regex": filter            }        }, {            lastName: {                "$regex": filter            }        }]    })
    res.json({        user: users.map(user => ({            username: user.username,            firstName: user.firstName,            lastName: user.lastName,            _id: user._id        }))    })})
Step 9 - Create Bank related Schema
Update the db.js file to add one new schemas and export the respective models
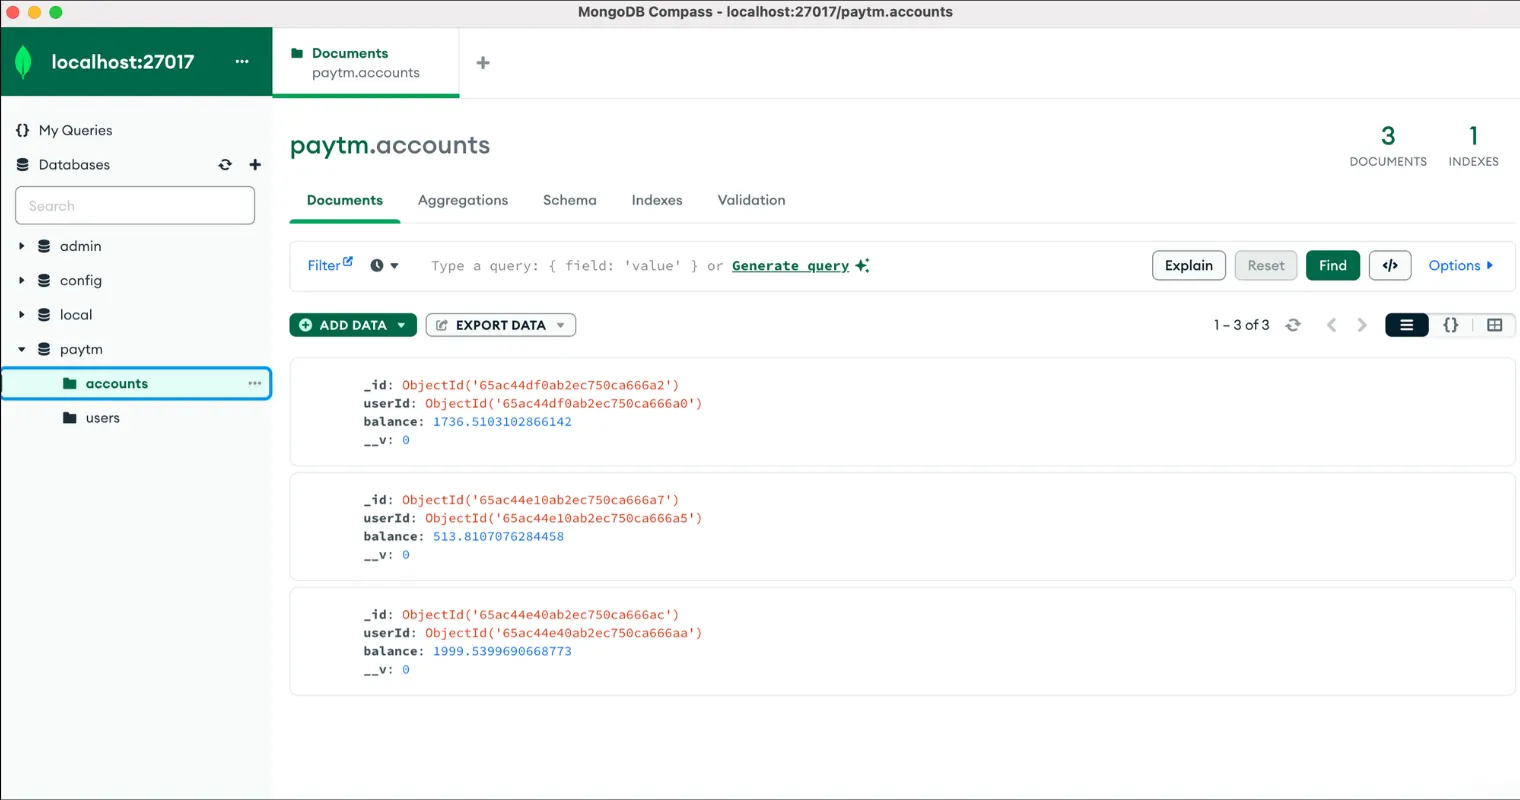
Accounts table
The Accounts table will store the INR balances of a user.
The schema should look something like this -
{ userId: ObjectId (or string), balance: float/number}In the real world, you shouldn’t store `floats` for balances in the database.You usually store an integer which represents the INR value withdecimal places (for eg, if someone has 33.33 rs in their account,you store 3333 in the database).
There is a certain precision that you need to support (which for india is2/4 decimal places) and this allows you to get rid of precisionerrors by storing integers in your DBYou should reference the users table in the schema (Hint - https://medium.com/@mendes.develop/joining-tables-in-mongodb-with-mongoose-489d72c84b60)
Solution
const accountSchema = new mongoose.Schema({    userId: {        type: mongoose.Schema.Types.ObjectId, // Reference to User model        ref: 'User',        required: true    },    balance: {        type: Number,        required: true    }});
const Account = mongoose.model('Account', accountSchema);
module.exports = {  Account}
By the end of it, db.js should look lie this
const mongoose = require('mongoose');
mongoose.connect("mongodb://localhost:27017/paytm")
// Create a Schema for Usersconst userSchema = new mongoose.Schema({    username: {        type: String,        required: true,        unique: true,        trim: true,        lowercase: true,        minLength: 3,        maxLength: 30    },    password: {        type: String,        required: true,        minLength: 6    },    firstName: {        type: String,        required: true,        trim: true,        maxLength: 50    },    lastName: {        type: String,        required: true,        trim: true,        maxLength: 50    }});
const accountSchema = new mongoose.Schema({    userId: {        type: mongoose.Schema.Types.ObjectId, // Reference to User model        ref: 'User',        required: true    },    balance: {        type: Number,        required: true    }});
const Account = mongoose.model('Account', accountSchema);const User = mongoose.model('User', userSchema);
module.exports = {  User,  Account,};
Step 10 - Transactions in databases
A lot of times, you want multiple databases transactions to be atomic
Either all of them should update, or none should
This is super important in the case of a bank
Can you guess what’s wrong with the following code -
const mongoose = require('mongoose');const Account = require('./path-to-your-account-model');
const transferFunds = async (fromAccountId, toAccountId, amount) => {    // Decrement the balance of the fromAccount    await Account.findByIdAndUpdate(fromAccountId, { $inc: { balance: -amount } });
    // Increment the balance of the toAccount    await Account.findByIdAndUpdate(toAccountId, { $inc: { balance: amount } });}
// Example usagetransferFunds('fromAccountID', 'toAccountID', 100);
Solution
- What if the database crashes right after the first request (only the balance is decreased for one user, and not for the second user)
- What if the Node.js crashes after the first update?
It would lead to a
database inconsistency. Amount would get debited from the first user, and not credited into the other users account. If a failure ever happens, the first txn should rollback. This is what is called atransactionin a database. We need to implement atransactionon the next set of endpoints that allow users to transfer INR
Step 11 - Initialize balances on signup
Update the signup endpoint to give the user a random balance between 1 and 10000.
This is so we don’t have to integrate with banks and give them random balances to start with.
Solution
router.post("/signup", async (req, res) => {    const { success } = signupBody.safeParse(req.body)    if (!success) {        return res.status(411).json({            message: "Email already taken / Incorrect inputs"        })    }
    const existingUser = await User.findOne({        username: req.body.username    })
    if (existingUser) {        return res.status(411).json({            message: "Email already taken/Incorrect inputs"        })    }
    const user = await User.create({        username: req.body.username,        password: req.body.password,        firstName: req.body.firstName,        lastName: req.body.lastName,    })    const userId = user._id;
    /// ----- Create new account ------
    await Account.create({        userId,        balance: 1 + Math.random() * 10000    })
    /// -----  ------
    const token = jwt.sign({        userId    }, JWT_SECRET);
    res.json({        message: "User created successfully",        token: token    })})
Step 12 - Create a new router for accounts
1. Create a new router
All user balances should go to a different express router (that handles all requests on /api/v1/account ).
Create a new router in routes/account.js and add export it
Solution
const express = require('express');
const router = express.Router();
module.exports = router;
2. Route requests to it
Send all requests from /api/v1/account/* in routes/index.js to the router created in step 1.
Solution
const express = require('express');const userRouter = require("./user");const accountRouter = require("./account");
const router = express.Router();
router.use("/user", userRouter);router.use("/account", accountRouter);
module.exports = router;
Step 13 - Balance and transfer Endpoints
Here, you’ll be writing a bunch of APIs for the core user balances. There are 2 endpoints that we need to implement
1. An endpoint for user to get their balance.
Method: GET Route: /api/v1/account/balance
Response:
Status code - 200
{ balance: 100}Solution
router.get("/balance", authMiddleware, async (req, res) => {    const account = await Account.findOne({        userId: req.userId    });
    res.json({        balance: account.balance    })});
2. An endpoint for user to transfer money to another account
Method: POST Route: /api/v1/account/transfer Body
{ to: string, amount: number}Response:
Status code - 200
{ message: "Transfer successful"}Status code - 400
{ message: "Insufficient balance"}Status code - 400
{ message: "Invalid account"}Bad Solution (doesn’t use transactions)
router.post("/transfer", authMiddleware, async (req, res) => {    const { amount, to } = req.body;
    const account = await Account.findOne({        userId: req.userId    });
    if (account.balance < amount) {        return res.status(400).json({            message: "Insufficient balance"        })    }
    const toAccount = await Account.findOne({        userId: to    });
    if (!toAccount) {        return res.status(400).json({            message: "Invalid account"        })    }
    await Account.updateOne({        userId: req.userId    }, {        $inc: {            balance: -amount        }    })
    await Account.updateOne({        userId: to    }, {        $inc: {            balance: amount        }    })
    res.json({        message: "Transfer successful"    })});
Good solution (uses txns in db
router.post("/transfer", authMiddleware, async (req, res) => {    const session = await mongoose.startSession();
    session.startTransaction();    const { amount, to } = req.body;
    // Fetch the accounts within the transaction    const account = await Account.findOne({ userId: req.userId }).session(session);
    if (!account || account.balance < amount) {        await session.abortTransaction();        return res.status(400).json({            message: "Insufficient balance"        });    }
    const toAccount = await Account.findOne({ userId: to }).session(session);
    if (!toAccount) {        await session.abortTransaction();        return res.status(400).json({            message: "Invalid account"        });    }
    // Perform the transfer    await Account.updateOne({ userId: req.userId }, { $inc: { balance: -amount } }).session(session);    await Account.updateOne({ userId: to }, { $inc: { balance: amount } }).session(session);
    // Commit the transaction    await session.commitTransaction();    res.json({        message: "Transfer successful"    });});
Problems you might run into
Problems you might run into If you run into the problem mentioned above, feel free to proceed with the bad solution
Final Solution
Finally, the account.js file should look like this
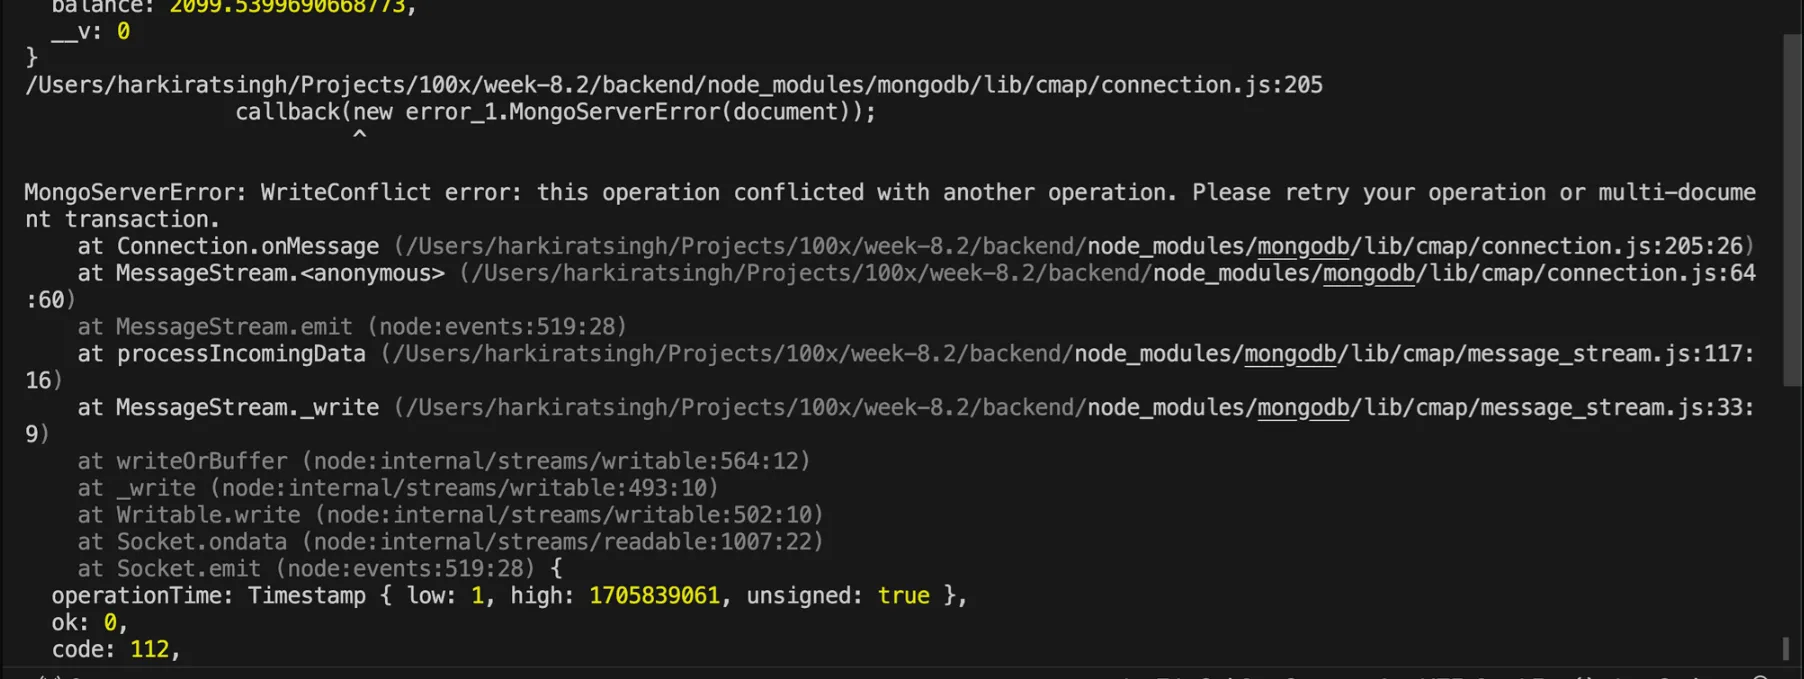
Experiment to ensure transactions are working as expected
Try running this code locally. It calls transfer twice on the same account ~almost concurrently
Code
const express = require('express');const { authMiddleware } = require('../middleware');const { Account } = require('../db');const { default: mongoose } = require('mongoose');
const router = express.Router();
router.get("/balance", authMiddleware, async (req, res) => {    const account = await Account.findOne({        userId: req.userId    });
    res.json({        balance: account.balance    })});
async function transfer(req) {    const session = await mongoose.startSession();
    session.startTransaction();    const { amount, to } = req.body;
    // Fetch the accounts within the transaction    const account = await Account.findOne({ userId: req.userId }).session(session);
    if (!account || account.balance < amount) {        await session.abortTransaction();        console.log("Insufficient balance")        return;    }
    const toAccount = await Account.findOne({ userId: to }).session(session);
    if (!toAccount) {        await session.abortTransaction();        console.log("Invalid account")        return;    }
    // Perform the transfer    await Account.updateOne({ userId: req.userId }, { $inc: { balance: -amount } }).session(session);    await Account.updateOne({ userId: to }, { $inc: { balance: amount } }).session(session);
    // Commit the transaction    await session.commitTransaction();    console.log("done")}
transfer({    userId: "65ac44e10ab2ec750ca666a5",    body: {        to: "65ac44e40ab2ec750ca666aa",        amount: 100    }})
transfer({    userId: "65ac44e10ab2ec750ca666a5",    body: {        to: "65ac44e40ab2ec750ca666aa",        amount: 100    }})module.exports = router;
Error
Step 14 - Checkpoint your solution
A completely working backend can be found here - https://github.com/100xdevs-cohort-2/paytm/tree/backend-solution
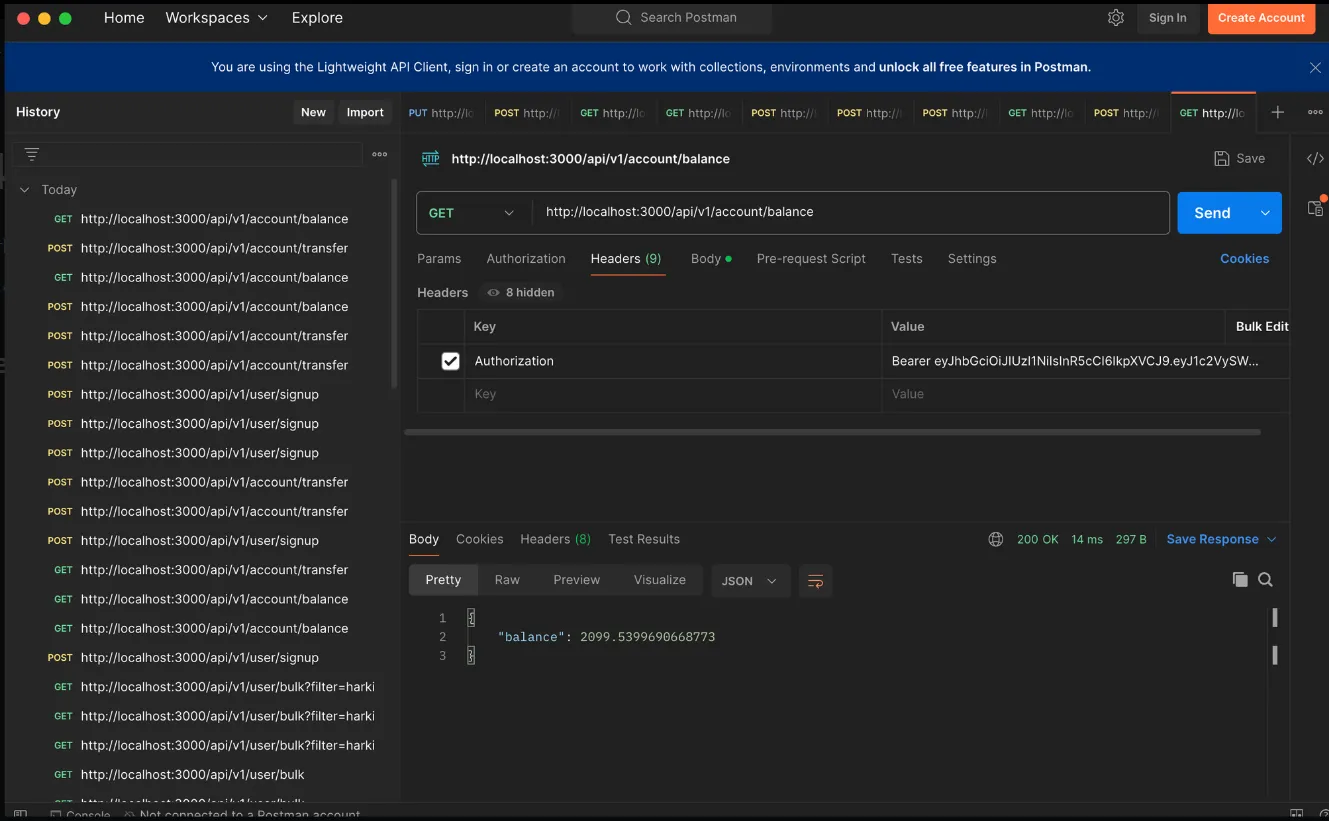
Try to send a few calls via postman to ensure you are able to sign up/sign in/get balance
Get balance
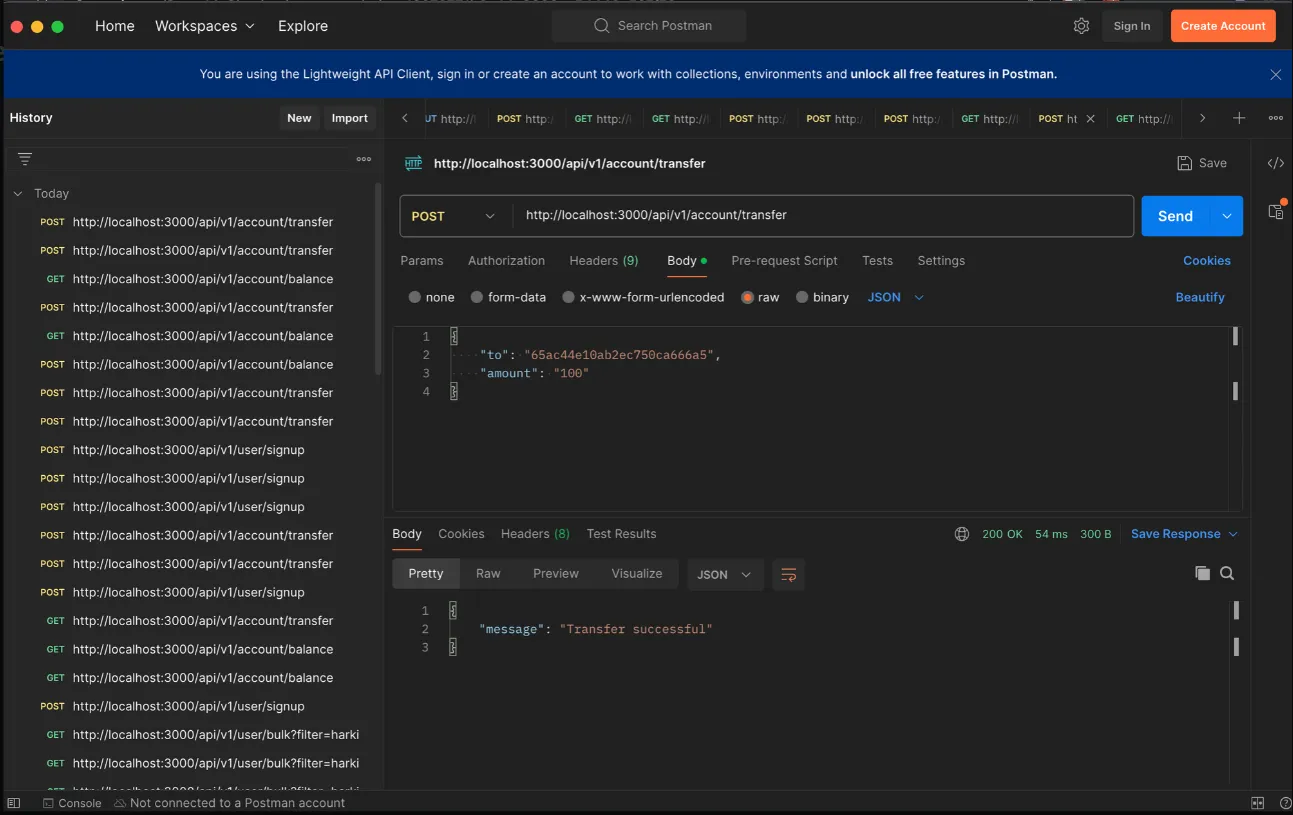
Make transfer
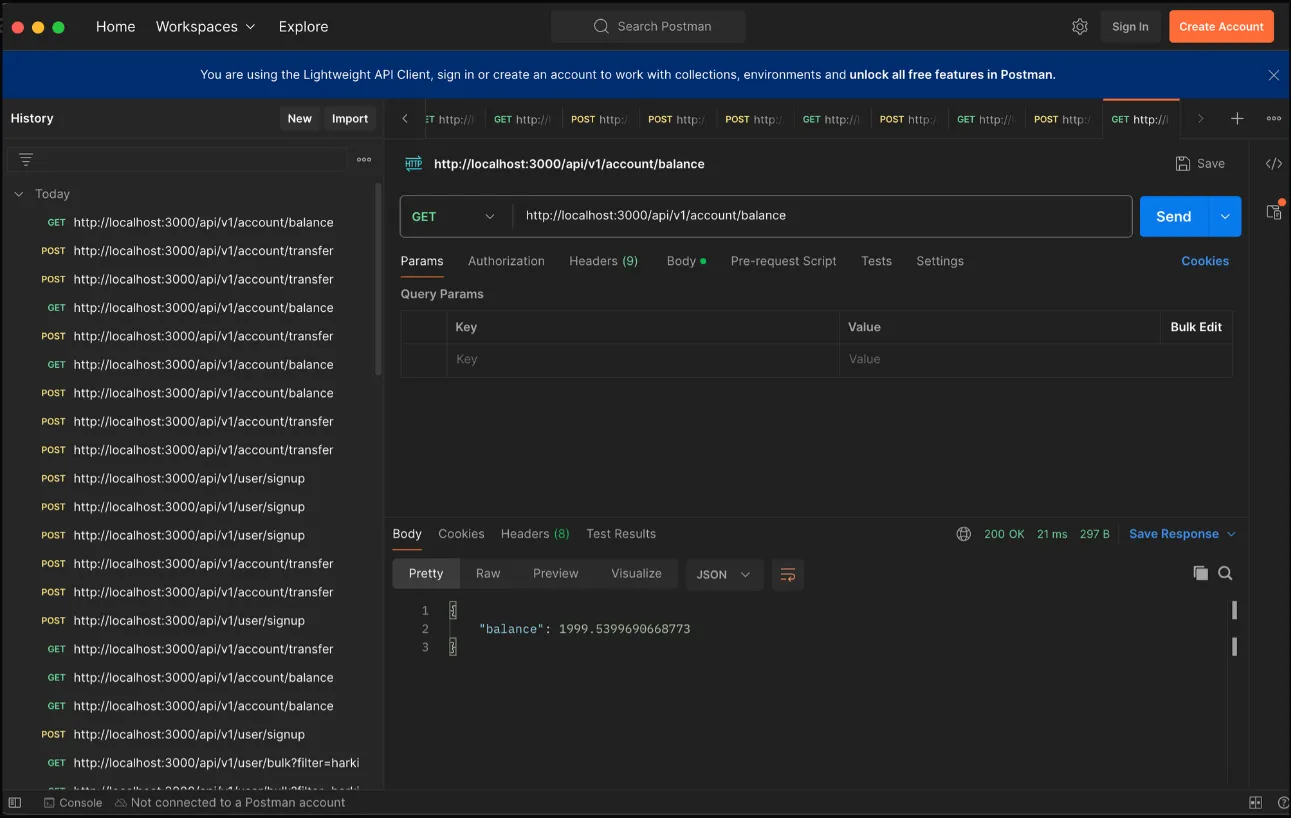
Get balance again (notice it went down)
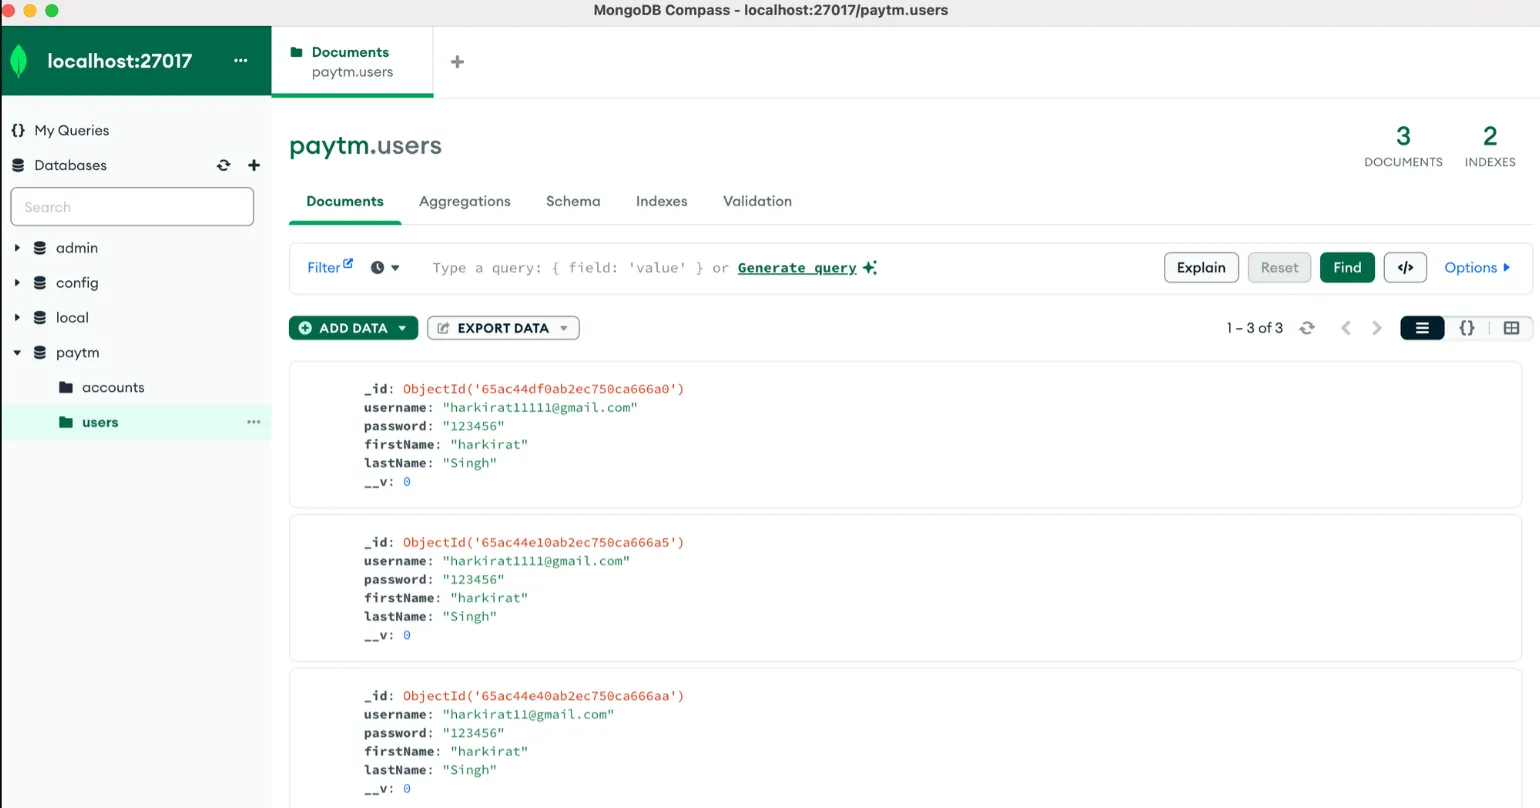
Mongo should look something like this