Week 18.2 CI CD
In this lecture, Harkirat introduces CI/CD and its role in automating the building, testing, and deployment of code changes in open source projects. He demonstrates how to create CI/CD Pipelines using GitHub Actions, containerize applications with Docker, and Deploy them to various environments. Students will gain a solid understanding of CI/CD principles and practical skills to implement pipelines in their own projects.
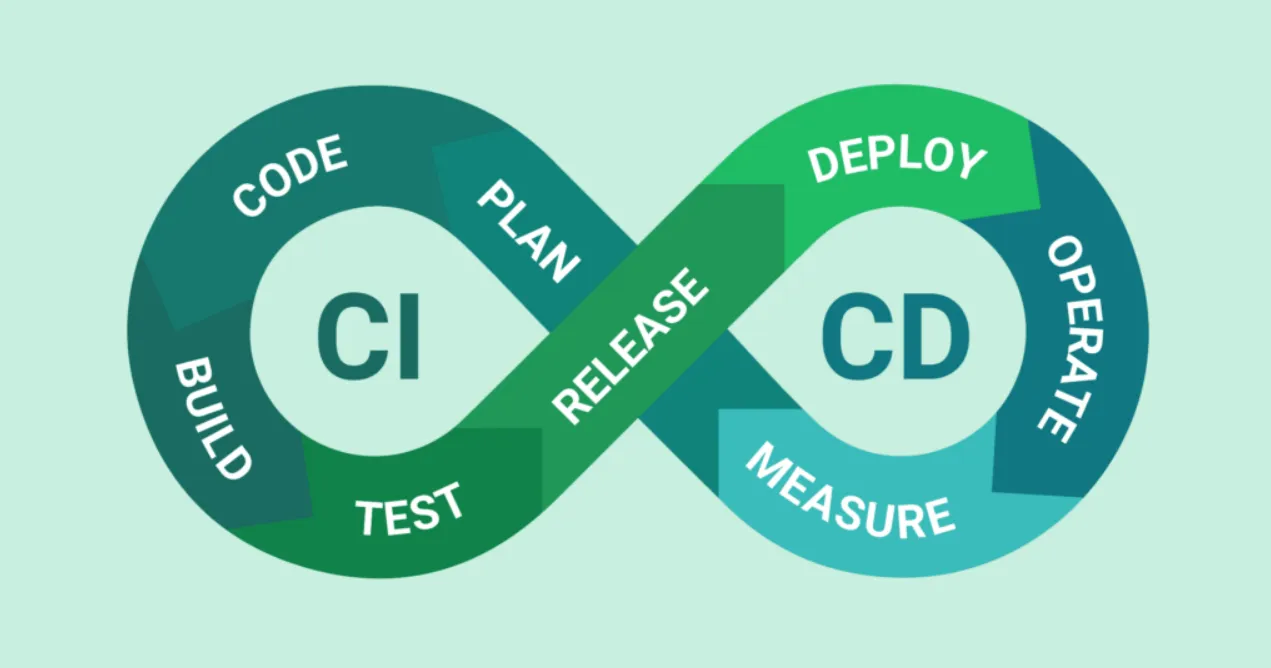
What is CI and CD?
Continuous Integration (CI) is a development practice where developers frequently integrate their code changes into a shared repository, often multiple times a day. Each integration is automatically verified by building the project and running automated tests. This process enables teams to detect problems early, improve software quality, and reduce the time required to validate and release new software updates.
Continuous Deployment (CD), as the name suggests, involves continuously deploying your code to various environments, such as development, staging, and production. CD ensures that the code changes are automatically deployed to the target environment once they pass the CI process, reducing manual intervention and streamlining the deployment process.
CI/CD in Open Source Projects
In open source projects, CI/CD plays a crucial role in ensuring the quality and reliability of the codebase. With multiple contributors working on the project, it becomes essential to have a robust CI/CD pipeline in place. Here are some key aspects of CI/CD in open source projects:
- Code Integration: Open source projects rely on version control systems like Git to manage code contributions from various developers. CI/CD pipelines are triggered whenever new code changes are pushed to the repository, automatically building the project and running tests to ensure the changes integrate smoothly with the existing codebase.
- Automated Testing: Open source projects heavily rely on automated testing to maintain code quality. CI/CD pipelines include a comprehensive suite of tests, including unit tests, integration tests, and end-to-end tests. These tests are automatically executed with each code change, providing quick feedback on the stability and correctness of the code.
- Workflows: CI/CD workflows define the series of steps that are executed when code changes are pushed to the repository. These workflows typically include tasks such as building the project, running tests, generating documentation, and deploying the code to different environments. Open source projects often use popular CI/CD platforms like Travis CI, CircleCI, or GitHub Actions to define and manage these workflows.
- Code Quality Checks: In addition to automated tests, CI/CD pipelines in open source projects often incorporate code quality checks. These checks include linting, static code analysis, and security scans to identify potential issues, maintain coding standards, and ensure the overall quality of the codebase.
- Deployment Automation: CD pipelines automate the deployment process, ensuring that the code changes are seamlessly deployed to the target environment once they pass all the necessary checks. This automation reduces the risk of human error and enables faster and more frequent releases.
Continuous Deployment in Github
In this section, we’ll explore Continuous Deployment (CD) using GitHub Actions to deploy a Next.js application to EC2 servers via Docker.
Key points:
- We’ll be using Docker to containerize the Next.js application and deploy it to EC2 instances.
- While Docker may not be strictly necessary for deploying to a simple EC2 server, it becomes more relevant when deploying to platforms like GCP App Runner, Amazon ECS, or Kubernetes, where containerization is commonly used.
- Dockerizing the application provides benefits such as consistency, portability, and scalability across different environments.
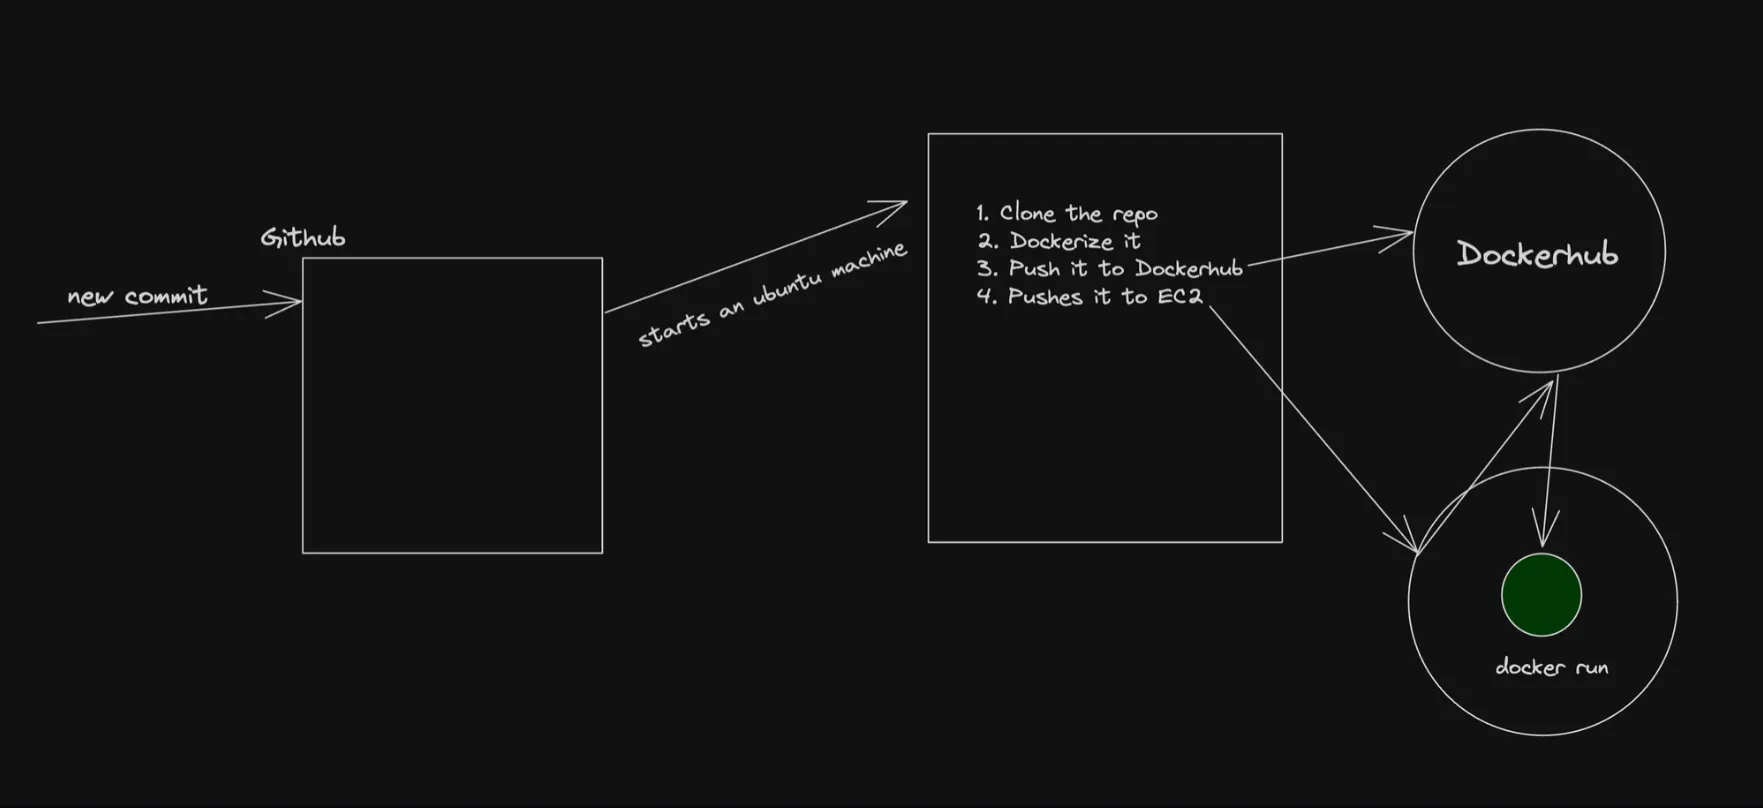
Architecture diagram:
The architecture diagram illustrates the CD process once it is set up. When a new commit is pushed to the GitHub repository, it triggers a workflow that consists of a series of steps executed on a GitHub-hosted machine (runner). The workflow typically includes the following steps:
- Checkout the latest code from the repository.
- Build the Next.js application.
- Create a Docker image of the application.
- Push the Docker image to a container registry like Docker Hub.
- Deploy the Docker image to the EC2 server.
The last step of the workflow may vary depending on the target deployment environment. For example:
- If deploying to an EC2 server, the workflow may SSH into the server, pull the latest Docker image, and start the container.
- If deploying to GCP App Runner or Amazon ECS, the workflow may update the application configuration to use the latest Docker image.
- If deploying to Kubernetes, the workflow may update the Kubernetes deployment manifest and apply the changes to the cluster.
Benefits of Dockerizing the application:
- Consistency: Docker ensures that the application runs consistently across different environments, eliminating the “it works on my machine” problem.
- Portability: Dockerized applications can be easily moved between different platforms and cloud providers without significant modifications.
- Scalability: Docker allows for easy scaling of the application by spinning up multiple containers as needed.
- Isolation: Each Docker container runs in its own isolated environment, preventing conflicts with other applications or dependencies.
CD process in GitHub:
- Developers push their code changes to the GitHub repository.
- The push event triggers the GitHub Actions workflow.
- The workflow checks out the latest code and builds the Next.js application.
- A Docker image of the application is created.
- The Docker image is pushed to a container registry like Docker Hub.
- The workflow deploys the Docker image to the EC2 server (or other target environment) based on the specified configuration.
Monorepo we’re dealing with today
Now, we’ll be working with a monorepo that contains three applications: bank-webhook, merchant-app, and user-app. The goal is to deploy all three applications to the same EC2 instance using a CI/CD pipeline.
The monorepo we’re dealing with today can be found at: https://github.com/100xdevs-cohort-2/week-18-2-ci-cd
To get started with creating the CI pipeline, follow these steps:
-
Fork the repo
week-18-ci-cdto your own GitHub account. This will allow you to make changes and follow along with the tutorial. -
Clone the forked repository to your local machine:
Terminal window git clone <https://github.com/your-username/week-18-2-ci-cd.git> -
Navigate to the cloned repository and install the dependencies:
Terminal window cd week-18-2-ci-cdnpm install -
Generate the Prisma client by navigating to the
packages/dbdirectory and running the following command:Terminal window cd packages/dbnpx prisma generate
Monorepo Structure
The monorepo structure looks like this:
week-18-2-ci-cd/├── apps/│ ├── bank-webhook/│ │ ├── src/│ │ └── package.json│ ├── merchant-app/│ │ ├── src/│ │ └── package.json│ └── user-app/│ ├── src/│ └── package.json├── packages/│ └── db/│ ├── prisma/│ │ ├── schema.prisma│ │ └── migrations/│ └── package.json└── package.jsonThe apps/ directory contains the three applications:
bank-webhook: An application that handles webhooks from the bank.merchant-app: An application for merchants to manage their transactions and settings.user-app: An application for users to perform transactions and manage their accounts.
The packages/ directory contains shared packages used by the applications. In this case, we have the db package, which contains the Prisma schema and migrations for the database.
To deploy all three applications to the same EC2 instance, we’ll set up a CI/CD pipeline using GitHub Actions. The pipeline will be triggered whenever changes are pushed to the repository. It will build the applications, create Docker images, and deploy them to the EC2 instance.
Overview of the CI/CD
Here’s a high-level overview of the CI/CD pipeline:
- Trigger: The pipeline is triggered when changes are pushed to the repository.
- Build: The pipeline builds the applications and their dependencies.
- Dockerize: Docker images are created for each application.
- Push: The Docker images are pushed to a container registry (e.g., Docker Hub).
- Deploy: The Docker images are deployed to the EC2 instance using a deployment script or a tool like AWS CodeDeploy.
By deploying all three applications to the same EC2 instance, we can simplify the infrastructure management and reduce costs. However, it’s important to ensure proper isolation and resource allocation between the applications to avoid conflicts and performance issues.
In the next steps, we’ll dive into the details of setting up the CI/CD pipeline using GitHub Actions and configuring the deployment to the EC2 instance.
Creating a CI/CD pipeline?
To create a CI/CD pipeline in GitHub, you can define your workflows in the .github/workflows directory of your repository. Each workflow is represented by a YAML file that specifies the triggers, jobs, and steps to be executed.
Here’s an example of a CI/CD pipeline that builds the application on pull requests to the master branch:
name: Build on PR
on: pull_request: branches: - master
jobs: build: runs-on: ubuntu-latest
steps: - uses: actions/checkout@v3 - name: Use Node.js uses: actions/setup-node@v3 with: node-version: '20'
- name: Install Dependencies run: npm install
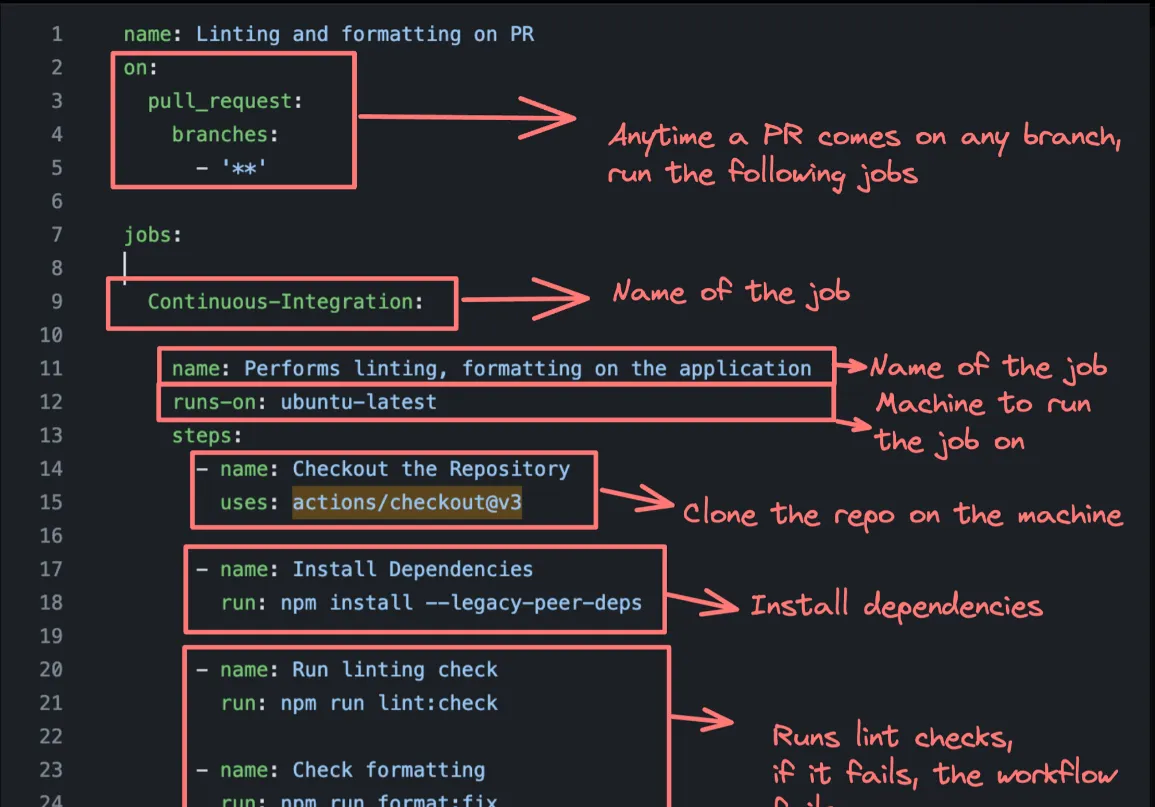
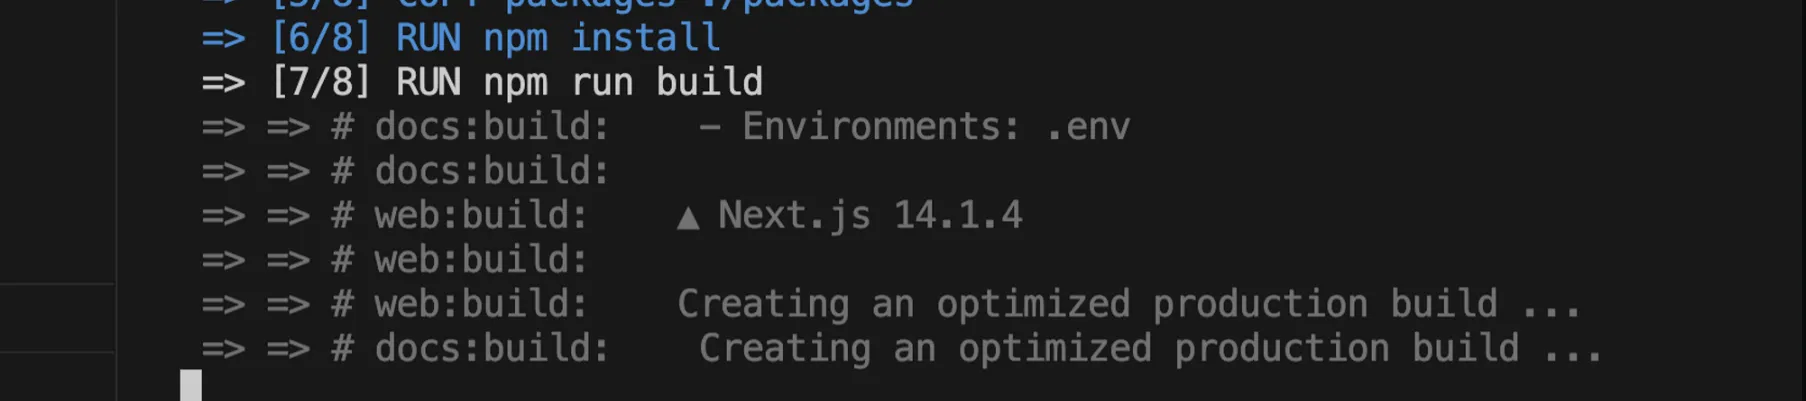
- name: Run Build run: npm run buildLet’s break down the different parts of this workflow:
name: Specifies the name of the workflow, in this case, “Build on PR”.on: Defines the event that triggers the workflow. Here, it is triggered on pull requests to themasterbranch.jobs: Contains the list of jobs to be executed in the workflow.build: Defines a job named “build”.runs-on: Specifies the type of machine to run the job on, in this case, an Ubuntu-based runner.steps: Lists the steps to be executed in the job.uses: actions/checkout@v3: Checks out the repository code.uses: actions/setup-node@v3: Sets up Node.js with the specified version.run: npm install: Installs the project dependencies.run: npm run build: Runs the build script defined in thepackage.jsonfile.
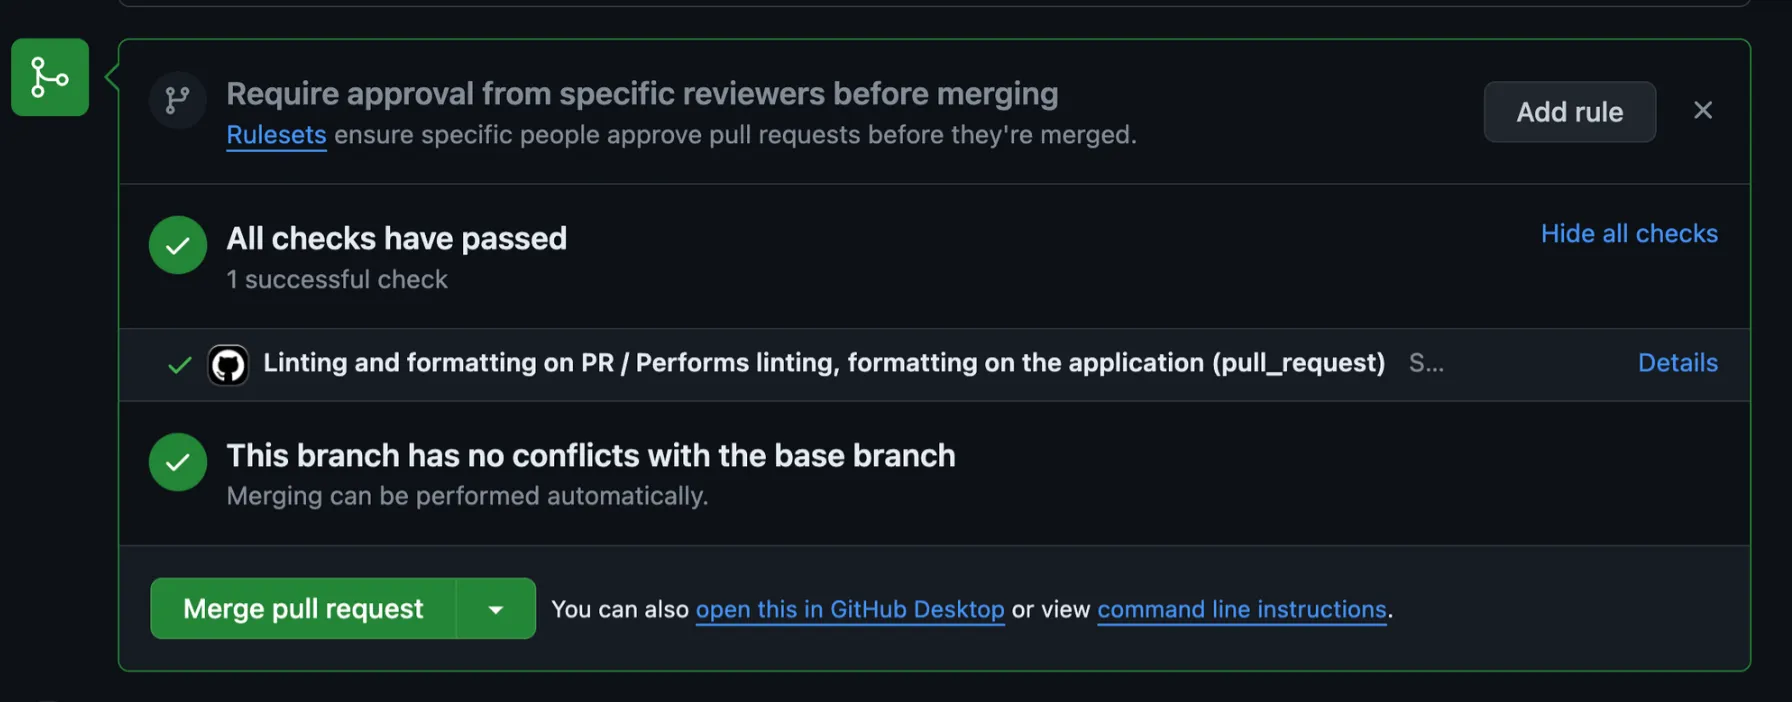
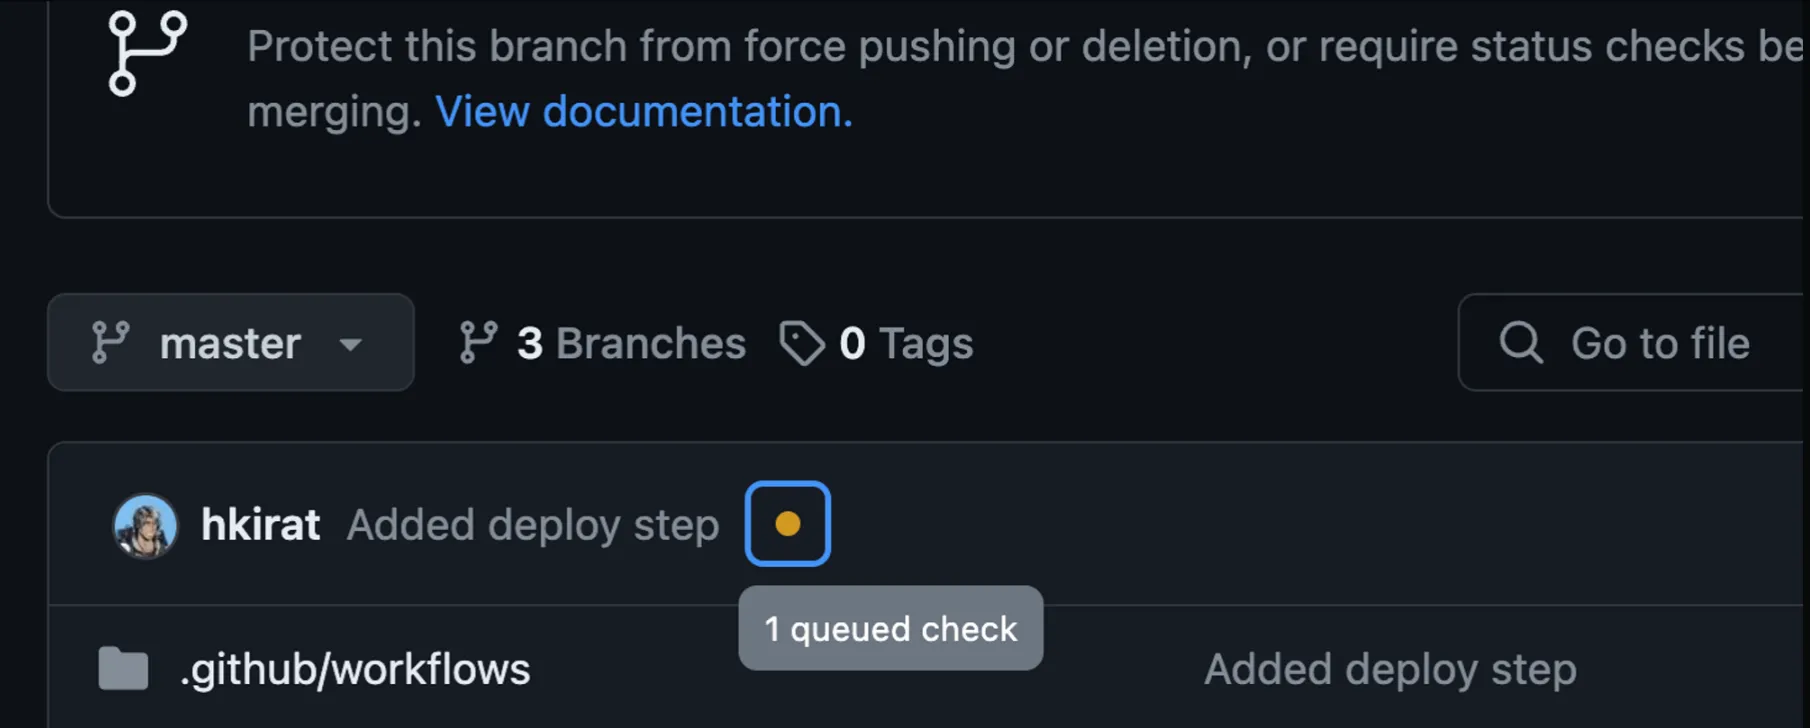
When a pull request is opened or updated against the master branch, this workflow will be triggered. It will check out the code, set up Node.js, install dependencies, and run the build script.
Once the workflow is completed, you can see the status of the checks on the pull request page. If all checks have passed, it indicates that the build was successful.
To visualize the workflow in JSON format, you can use online tools like https://onlineyamltools.com/convert-yaml-to-json. This can be helpful for understanding the structure and contents of the workflow.
Here’s an example of how the workflow might look in JSON format:
{ "name": "Build on PR", "on": { "pull_request": { "branches": [ "master" ] } }, "jobs": { "build": { "runs-on": "ubuntu-latest", "steps": [ { "uses": "actions/checkout@v3" }, { "name": "Use Node.js", "uses": "actions/setup-node@v3", "with": { "node-version": "20" } }, { "name": "Install Dependencies", "run": "npm install" }, { "name": "Run Build", "run": "npm run build" } ] } }}This JSON representation provides a clear view of the workflow structure and the different elements within it.
By creating CI/CD pipelines using GitHub Actions, you can automate the build, test, and deployment processes for your applications, ensuring that changes are properly validated and deployed to the desired environments.
Create the CI pipeline
The goal of this step is to ensure that whenever someone creates a pull request (PR), the project is built successfully before allowing the PR to be merged. This helps catch any build errors early in the development process.
Adding Build Pipeline
To add a build pipeline, we’ll create a GitHub Actions workflow that runs whenever a PR is created against the master branch. The workflow will install dependencies and run the npm run build command to ensure the project builds successfully.
- Fork the main repo: https://github.com/100xdevs-cohort-2/week-18-2-ci-cd
- In the forked repository, create a new file named
.github/workflows/build.ymlin the root folder. - Add the following workflow configuration to the
build.ymlfile:
name: Build on PR
on:  pull_request:    branches:      - master
jobs:  build:    runs-on: ubuntu-latest    steps:      - uses: actions/checkout@v3      - name: Use Node.js        uses: actions/setup-node@v3        with:          node-version: '20'
      - name: Install Dependencies        run: npm install
      - name: Generate Prisma Client        run: npx prisma generate
      - name: Run Build        run: npm run build
This workflow does the following:
- It is triggered on pull requests against the
masterbranch. - It runs on an Ubuntu-based runner.
- It checks out the repository code using
actions/checkout@v3. - It sets up Node.js version 20 using
actions/setup-node@v3. - It installs the project dependencies using
npm install. - It generates the Prisma client using
npx prisma generate. - It runs the build command using
npm run build.
- Commit and push the changes to the
masterbranch of your forked repository. - Create a new branch with some minimal changes and create a PR from it to the
masterbranch. - You should see the workflow run automatically when the PR is created. The build status will be displayed on the PR page.
Prisma Commands Recap
npx prisma generate: Generates the Prisma client based on the Prisma schema.
Changes in package.json:
Make sure the scripts section in package.json includes the necessary commands for building the project. For example:
"scripts": { "build": "turbo build", "dev": "turbo dev", "lint": "turbo lint", "format": "prettier --write \"**/*.{ts,tsx,md}\"", "db:generate": "cd packages/db && npx prisma generate && cd ../..",}Adding Prisma Generate to the Workflow:
We added the npx prisma generate command to the workflow to ensure that the Prisma client is generated before running the build command. This step is important if your project relies on the Prisma client for database operations.
Deploy Step
Let’s add a deploy step to our CI/CD pipeline to containerize and deploy our application using Docker.
- Create Dockerfiles for the apps:
-
Create a new file named
docker/Dockerfile.userin the root of your repository. -
Add the following content to the
Dockerfile.user:FROM node:20.12.0-alpine3.19WORKDIR /usr/src/appCOPY package.json package-lock.json turbo.json tsconfig.json ./COPY apps ./appsCOPY packages ./packages# Install dependenciesRUN npm install# Generate Prisma clientRUN npm run generate-prisma# Build only the user-appRUN npm run build --filter=user-appCMD ["npm", "run", "start-user-app"]This Dockerfile does the following:
- It uses the
node:20.12.0-alpine3.19image as the base. - It sets the working directory to
/usr/src/app. - It copies the necessary files (
package.json,package-lock.json,turbo.json,tsconfig.json) to the working directory. - It copies the
appsandpackagesdirectories. - It installs the dependencies using
npm install. - It generates the Prisma client by running
npm run generate-prisma(assuming you have added this script to the rootpackage.json). - It builds only the
user-appusingnpm run build --filter=user-app. - It sets the command to start the
user-appusingnpm run start-user-app.
- It uses the
-
- Add the necessary scripts to the root
package.json:-
Open the
package.jsonfile in the root of your repository. -
Add the following scripts to the
scriptssection:"scripts": {"generate-prisma": "cd packages/db && npx prisma generate && cd ../..","start-user-app": "cd ./apps/user-app && npm run start",// Other scripts}- The
generate-prismascript navigates to thepackages/dbdirectory, runsnpx prisma generate, and then navigates back to the root directory. - The
start-user-appscript navigates to theapps/user-appdirectory and runs thestartscript defined in itspackage.json.
- The
-
- Before deploying your image to Docker Hub:
- Sign in to your Docker Hub account.
- Create a new repository on Docker Hub for your application.
- Set up GitHub Action secrets:
- Go to your GitHub repository’s settings.
- Navigate to the “Secrets” section.
- Add the following secrets:
DOCKER_USERNAME: Your Docker Hub username.DOCKER_PASSWORD: Your Docker Hub password or access token.
- Create the CD pipeline:
-
Create a new file named
.github/workflows/deploy.ymlin your repository. -
Add the following content to the
deploy.ymlfile:name: Build and Deploy to Docker Hubon:push:branches:- masterjobs:build-and-push:runs-on: ubuntu-lateststeps:- name: Check Out Repouses: actions/checkout@v2- name: Log in to Docker Hubuses: docker/login-action@v1with:username: ${{ secrets.DOCKER_USERNAME }}password: ${{ secrets.DOCKER_PASSWORD }}- name: Build and Push Docker imageuses: docker/build-push-action@v2with:context: .file: ./docker/Dockerfile.userpush: truetags: your-dockerhub-username/your-repo-name:latest- name: Verify Pushed Imagerun: docker pull your-dockerhub-username/your-repo-name:latestReplace
your-dockerhub-usernameandyour-repo-namewith your actual Docker Hub username and repository name.This workflow does the following:
- It is triggered on pushes to the
masterbranch. - It checks out the repository code.
- It logs in to Docker Hub using the
DOCKER_USERNAMEandDOCKER_PASSWORDsecrets. - It builds the Docker image using the
Dockerfile.userand pushes it to your Docker Hub repository with thelatesttag. - It verifies the pushed image by pulling it from Docker Hub.
- It is triggered on pushes to the
-

- Commit and push the changes to your repository.
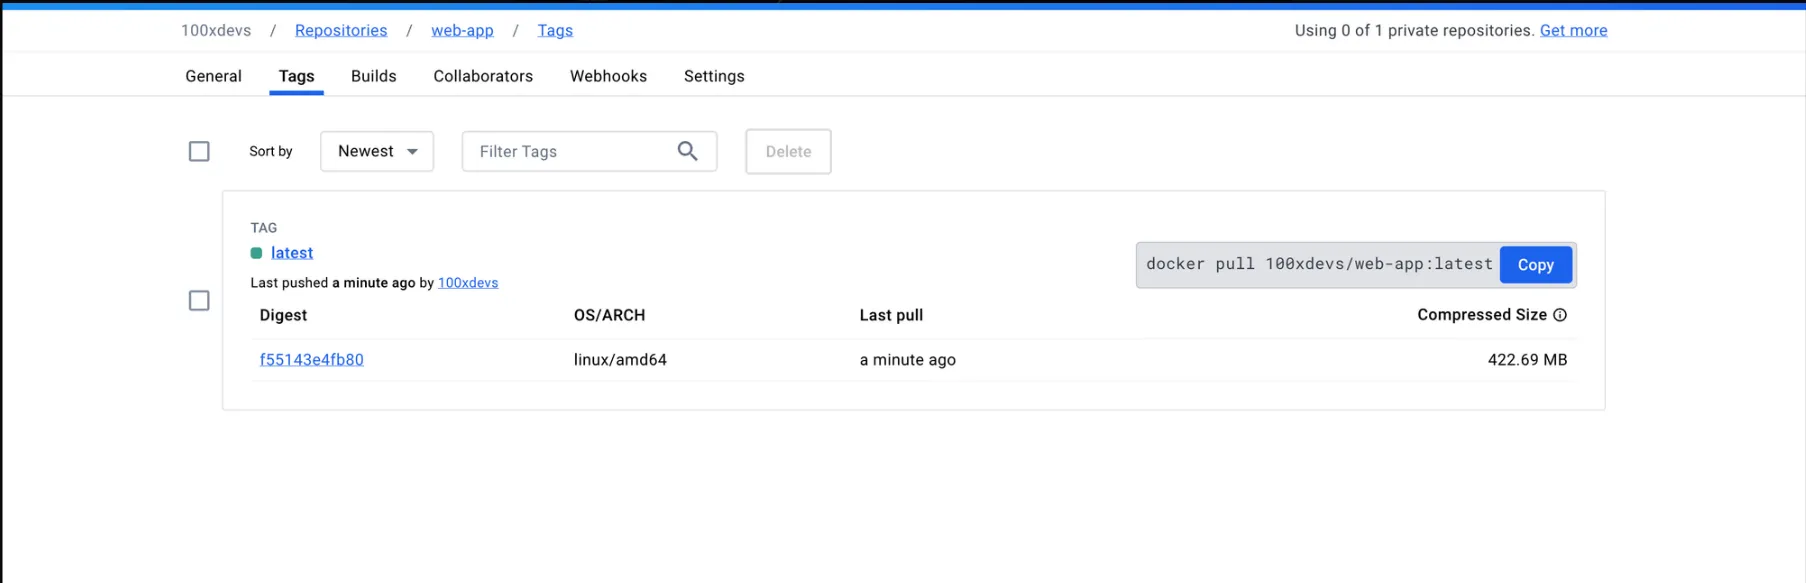
With these changes, whenever a push is made to the master branch, the CD pipeline will build the user-app, create a Docker image, and push it to your Docker Hub repository.
You have now successfully containerized your application and set up a CD pipeline to deploy it to Docker Hub.
Note: If your application requires additional environment variables (like database URL) for the build to work as expected, you can inject them as build arguments in the docker/build-push-action@v2 step of the workflow. Remember to check your Docker Hub repository to ensure that the image has been successfully pushed.
Pulling the Docker Image
Let’s dive into the process of pulling the Docker image and deploying it to an EC2 instance using GitHub Actions.
- Create an EC2 instance:
- Launch a new EC2 instance on AWS.
- Choose an Ubuntu base image for the instance.
- Configure the security group to allow HTTP/HTTPS traffic.
- Download the key pair file for SSH access to the instance.
- Install Docker on the EC2 instance:
-
Connect to the EC2 instance via SSH using the key pair file.
-
Follow the instructions from the Docker documentation to install Docker on Ubuntu: https://docs.docker.com/engine/install/ubuntu/
-
Verify the Docker installation by running the following command:
Terminal window sudo docker run hello-world
-
- Update the GitHub Actions workflow to pull the latest image on the EC2 instance:
-
Modify the existing workflow file (e.g.,
.github/workflows/build-and-deploy.yml) to include the deployment step to the EC2 instance. -
Here’s an updated version of the workflow:
name: Build and Deploy to Docker Hubon:push:branches:- masterjobs:build-and-push:runs-on: ubuntu-lateststeps:- name: Check Out Repouses: actions/checkout@v2- name: Prepare Dockerfilerun: cp ./docker/Dockerfile.user ./Dockerfile- name: Log in to Docker Hubuses: docker/login-action@v1with:username: ${{ secrets.DOCKER_USERNAME }}password: ${{ secrets.DOCKER_PASSWORD }}- name: Build and Push Docker imageuses: docker/build-push-action@v2with:context: .file: ./Dockerfilepush: truetags: 100xdevs/web-app:latest- name: Verify Pushed Imagerun: docker pull 100xdevs/web-app:latest- name: Deploy to EC2uses: appleboy/ssh-action@masterwith:host: ${{ secrets.SSH_HOST }}username: ${{ secrets.SSH_USERNAME }}key: ${{ secrets.SSH_KEY }}script: |sudo docker pull 100xdevs/web-app:latestsudo docker stop web-app || truesudo docker rm web-app || truesudo docker run -d --name web-app -p 3005:3000 100xdevs/web-app:latest -
The
Deploy to EC2step uses theappleboy/ssh-actionto connect to the EC2 instance via SSH and execute the deployment commands. -
Make sure to set the necessary secrets (
SSH_HOST,SSH_USERNAME,SSH_KEY) in your GitHub repository settings to provide the SSH connection details.
-
- Configure the domain and Nginx reverse proxy:
-
Point the desired domain (e.g.,
userapp.your_domain.com) to the public IP address of the EC2 instance. -
Install Nginx on the EC2 instance.
-
Create an Nginx configuration file (e.g.,
/etc/nginx/sites-available/userapp) with the following content:server {server_name userapp.100xdevs.com;location / {proxy_pass <http://localhost:3005>;proxy_http_version 1.1;proxy_set_header Upgrade $http_upgrade;proxy_set_header Connection 'upgrade';proxy_set_header Host $host;proxy_cache_bypass $http_upgrade;# Basic Authenticationauth_basic "Restricted Content";auth_basic_user_file /etc/nginx/.htpasswd;}listen 443 ssl;ssl_certificate /etc/letsencrypt/live/userapp.100xdevs.com/fullchain.pem;ssl_certificate_key /etc/letsencrypt/live/userapp.100xdevs.com/privkey.pem;include /etc/letsencrypt/options-ssl-nginx.conf;ssl_dhparam /etc/letsencrypt/ssl-dhparams.pem;} -
Enable the Nginx configuration by creating a symbolic link:
Terminal window sudo ln -s /etc/nginx/sites-available/userapp /etc/nginx/sites-enabled/ -
Restart Nginx for the changes to take effect:
Terminal window sudo service nginx restart
-
- Install Certbot and obtain an SSL certificate:
-
Install Certbot and the Nginx plugin:
Terminal window sudo apt-get install certbot python3-certbot-nginx -
Run Certbot to obtain and configure the SSL certificate:
Terminal window sudo certbot --nginx -
Follow the prompts to provide the necessary information and select the appropriate options.
-
Take-home assignments:
- Set up a database on a managed database service like Neon.tech, AWS RDS, or Aiven.
- Add a database migration step to the deployment process to ensure the database schema is up to date.
- Pass the database credentials as environment variables when starting the Docker container.
- Configure the Docker container to restart automatically if it goes down (similar to using PM2 for process management).
By following these steps, you’ll be able to pull the latest Docker image, deploy it to an EC2 instance, configure Nginx as a reverse proxy, secure the application with SSL, and ensure a smooth deployment process with database migrations and automatic restarts.