Week 14.2 Next js Backend
In this lecture, Harkirat introduces the backend capabilities of Next.js, showcasing how it can be used as a full-stack framework. We cover data fetching techniques, loaders, API routes, and implementing sign-in and sign-up functionality with both frontend and backend components.
Backends in Next.js
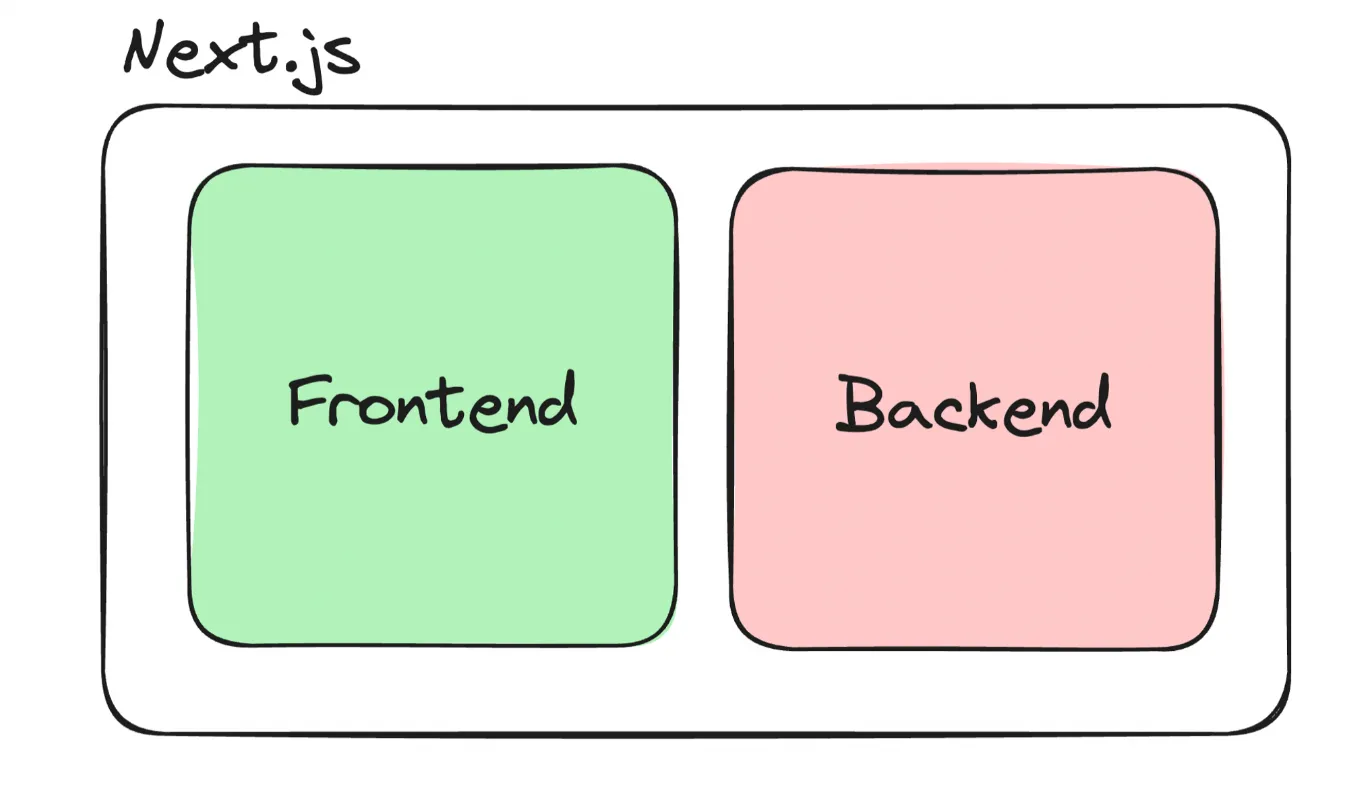
Next.js is often referred to as a full-stack framework, meaning it can handle both frontend and backend code within the same codebase. This is a powerful feature that sets Next.js apart from traditional frontend frameworks like React.
1] Single Codebase for Frontend and Backend
One of the key advantages of using Next.js for backend development is the ability to have a single codebase for both your frontend and backend code. This approach simplifies the development process and reduces the overhead of managing separate codebases for the frontend and backend.
By having a unified codebase, developers can easily share code, utilities, and logic between the frontend and backend components of their application. This promotes code reusability and consistency, making it easier to maintain and scale the codebase over time.
2] No CORS Issues, Single Domain Name
In traditional web development setups, where the frontend and backend are separate entities, developers often encounter Cross-Origin Resource Sharing (CORS) issues. CORS is a security mechanism that restricts cross-origin requests from one domain to another, which can cause problems when the frontend and backend are hosted on different domains.
With Next.js, since both the frontend and backend are part of the same codebase and deployed together, there is no need to worry about CORS issues. All requests from the frontend to the backend are treated as same-origin requests, eliminating the need for complex CORS configurations.
Additionally, having a single codebase means that your frontend and backend can share the same domain name, further simplifying the deployment and hosting process.
3] Ease of Deployment
Another significant advantage of using Next.js as a full-stack framework is the ease of deployment. Since the frontend and backend code are part of the same codebase, you can deploy the entire application as a single unit.
Next.js provides built-in support for various deployment platforms, such as Vercel (the company behind Next.js), Netlify, and AWS Amplify, among others. These platforms offer seamless deployment workflows, making it easy to deploy your Next.js application with minimal configuration.
Furthermore, Next.js supports serverless deployment, which means you can deploy your backend code as serverless functions, taking advantage of the scalability and cost-effectiveness of serverless architectures.
Recap of Data Fetching in React
In traditional React applications, data fetching typically happens on the client-side using hooks like useEffect or libraries like Axios or Fetch API. Here’s a common approach to fetch data from an API endpoint:
- Create a React component:
import React, { useState, useEffect } from 'react';
const UserCard = () => {  const [user, setUser] = useState(null);
  useEffect(() => {    const fetchUserData = async () => {      try {        const response = await fetch('<https://week-13-offline.kirattechnologies.workers.dev/api/v1/user/details>');        const data = await response.json();        setUser(data);      } catch (error) {        console.error('Error fetching user data:', error);      }    };
    fetchUserData();  }, []);
  if (!user) {    return <div>Loading...</div>;  }
  return (    <div>      <h2>User Details</h2>      <p>Name: {user.name}</p>      <p>Email: {user.email}</p>    </div>  );};
export default UserCard;- Use the
useEffecthook to fetch data:- The
useEffecthook is used to perform side effects in React components, such as fetching data from an API. - In the example above, the
useEffecthook is called when the component mounts, and it fetches user data from the provided API endpoint using thefetchfunction.
- The
- Handle the response and update state:
- Once the API response is received, the
json()method is used to parse the response data. - The parsed data is then stored in the component’s state using the
setUserfunction provided by theuseStatehook.
- Once the API response is received, the
- Render the user data:
- The component renders a loading message if the
userstate isnull(i.e., data is still being fetched). - Once the
userstate is updated with the fetched data, the component renders the user’s name and email.
- The component renders a loading message if the
By following this approach, you can fetch data from an API endpoint and display it in your React component. However, it’s important to note that this method of data fetching happens on the client-side, which means the initial page load may not have the user data available, potentially affecting the user experience and search engine optimization (SEO).
Data Fetching In NextJS
Next.js provides alternative approaches for data fetching, such as Server-Side Rendering (SSR) and Static Site Generation (SSG), which can improve the initial page load performance and SEO. We’ll explore these approaches in the upcoming sections.
- Initialize an Empty Next.js Project
First, we need to create a new Next.js project using the create-next-app command:
npx create-next-app@latest my-next-app- Install Axios
Next, we’ll install the Axios library, which we’ll use to make HTTP requests:
cd my-next-appnpm install axios- Clean Up the Initial Files
Let’s clean up the initial files by removing everything from pages/index.js and styles/globals.css.
- Fetch User Details
In the pages/index.js file, we’ll create an async function to fetch the user details from the provided API endpoint:
import axios from 'axios';
async function getUserDetails() { const response = await axios.get('<https://week-13-offline.kirattechnologies.workers.dev/api/v1/user/details>'); return response.data;}- Create an Async Component
Next.js supports async components, which means we can directly export an async function as the default component:
import axios from 'axios';
async function getUserDetails() {  const response = await axios.get('<https://week-13-offline.kirattechnologies.workers.dev/api/v1/user/details>');  return response.data;}
export default async function Home() {  const userData = await getUserDetails();
  return (    <div>      {userData.email}      {userData.name}    </div>  );}
In this example, the getUserDetails function fetches the user details from the API, and the Home component renders the user’s email and name.
- Check the Network Tab
If you start the development server (npm run dev) and visit http://localhost:3000, you should see the user’s email and name rendered on the page. Additionally, if you open the browser’s network tab, you should not see any waterfalling effect, as the data is fetched and rendered on the server-side.
- Prettify the UI
To improve the visual appearance of the page, we can add some styling using Tailwind CSS:
import axios from 'axios';
async function getUserDetails() {  const response = await axios.get('<https://week-13-offline.kirattechnologies.workers.dev/api/v1/user/details>');  return response.data;}
export default async function Home() {  const userData = await getUserDetails();
  return (    <div className="flex flex-col justify-center h-screen">      <div className="flex justify-center">        <div className="border p-8 rounded">          <div>            Name: {userData?.name}          </div>          {userData?.email}        </div>      </div>    </div>  );}
This code centers the user details vertically and horizontally on the page, adds a border and padding to the container, and displays the user’s name and email.
- Loader
In this example, we don’t need a separate loader component because the page is rendered on the server-side, and the user will only see the content once it’s fully rendered. However, if you need to show a loading state for more complex scenarios, you can use React’s Suspense and fallback components.
By following this approach, you can fetch data on the server-side in Next.js, pre-render the page with the fetched data, and provide a better user experience with improved performance and SEO optimization.
Loaders In NextJS
In Next.js, you can define a loading.tsx file (or loading.js for JavaScript) in the same directory as your page component. This file will be used to render a loading state while the page’s async operations, such as data fetching, are in progress.
Here’s how you can implement a custom loader in Next.js:
- Create a
loading.tsxfile
In the root directory of your Next.js project, create a new file called loading.tsx and add a custom loader component:
export default function Loading() { return ( <div className="flex flex-col justify-center h-screen"> <div className="flex justify-center"> <div className="animate-spin rounded-full h-32 w-32 border-t-2 border-b-2 border-gray-900"></div> </div> </div> );}In this example, we’re rendering a spinning loader using Tailwind CSS utility classes. You can customize the loader component according to your design requirements.
- Update the
Homecomponent
Next, update the Home component in pages/index.tsx to use the Loading component while fetching data:
import axios from 'axios';
async function getUserDetails() {  // Simulate a slow API call  await new Promise(resolve => setTimeout(resolve, 5000));  const response = await axios.get('<https://week-13-offline.kirattechnologies.workers.dev/api/v1/user/details>');  return response.data;}
export default async function Home() {  const userData = await getUserDetails();
  return (    <div className="flex flex-col justify-center h-screen">      <div className="flex justify-center">        <div className="border p-8 rounded">          <div>            Name: {userData?.name}          </div>          {userData?.email}        </div>      </div>    </div>  );}
In this example, we’ve added a simulated delay of 5 seconds to the getUserDetails function to mimic a slow API call.
- Start the development server
Run the development server with the following command:
npm run devWhen you visit http://localhost:3000, you should see the custom loader component rendered while the data is being fetched. After 5 seconds, the user details will be displayed.
By defining a
loading.tsxfile, Next.js automatically renders theLoadingcomponent while the page’s async operations are in progress. This provides a better user experience by showing a loading state instead of a blank page while data is being fetched.
Introducing API Routes In NextJS
Next.js provides a powerful feature called API Routes, which allows you to create server-side APIs directly within your Next.js application. This feature makes Next.js a full-stack framework, enabling you to build both the frontend and backend components of your application in a single codebase.
Benefits of Using Next.js for Backend
- Single Repository: By having both the frontend and backend code in the same repository, you can streamline your development workflow and simplify collaboration between frontend and backend developers.
- Standard Backend Features: Next.js API Routes provide similar functionality to popular backend frameworks like Express.js, allowing you to handle HTTP requests, define routes, and perform server-side operations.
- Direct Communication with Server Components: Server components in Next.js can directly communicate with the backend API routes, eliminating the need for cross-origin requests (CORS) and simplifying the development process.
Creating an API Route
To create an API route in Next.js, you need to create a file inside the pages/api directory. The file name will determine the route path. For example, if you create a file named pages/api/hello.js, the corresponding route will be /api/hello.
Here’s an example of a simple API route in Next.js:
export default function handler(req, res) { if (req.method === 'GET') { res.status(200).json({ message: 'Hello, world!' }); } else { res.status(405).json({ message: 'Method not allowed' }); }}In this example, the handler function receives the req (request) and res (response) objects, similar to Express.js. You can handle different HTTP methods (GET, POST, PUT, DELETE, etc.) and perform server-side operations accordingly.
To access this API route, you can send a GET request to http://localhost:3000/api/hello (during development) or https://your-domain.com/api/hello (in production).
Accessing API Routes from Server Components
One of the benefits of using Next.js API routes is the ability to directly access them from server components. This eliminates the need for cross-origin requests (CORS) and simplifies the development process.
Here’s an example of how you can fetch data from an API route in a server component:
export default async function Home() {  const res = await fetch('/api/hello');  const data = await res.json();
  return (    <div>      <h1>{data.message}</h1>    </div>  );}
In this example, the Home component fetches data from the /api/hello route using the fetch function. Since the API route is part of the same Next.js application, there’s no need to worry about CORS or cross-origin requests.
Let’s move the backend into our own app
- Create the API folder
First, create a new folder called api inside the pages directory. This is where we’ll define our API routes.
app/├── api/└── index.tsx- Create the user folder and route file
Inside the api folder, create a new folder called user. This folder will contain routes related to user data. Then, create a new file called route.ts inside the user folder.
app/├── api/│ └── user/│ └── route.ts└── index.tsx- Define the GET route
Open the route.ts file and define a GET route that returns hardcoded user details:
import { NextResponse } from 'next/server';
export async function GET() {  return NextResponse.json({    username: 'harkirat',    email: 'harkirat@gmail.com',  });}
In this example, we’re using the NextResponse utility from Next.js to send a JSON response with hardcoded user details.
- Update the
getUserDetailsfunction
Now, update the getUserDetails function in pages/index.tsx to fetch data from the new API route:
import axios from 'axios';
async function getUserDetails() {  try {    const response = await axios.get('<http://localhost:3000/api/user>');    return response.data;  } catch (e) {    console.log(e);  }}
export default async function Home() {  const userData = await getUserDetails();
  return (    <div className="flex flex-col justify-center h-screen">      <div className="flex justify-center">        <div className="border p-8 rounded">          <div>            Name: {userData?.username}          </div>          {userData?.email}        </div>      </div>    </div>  );}
In this updated code, we’re using Axios to fetch data from the http://localhost:3000/api/user route, which corresponds to the API route we defined earlier.
- Start the development server
Run the development server with the following command:
npm run devWhen you visit http://localhost:3000, you should see the hardcoded user details rendered on the page.
By creating an API route within our Next.js app, we’ve moved the backend logic into our application. This approach allows us to have a unified codebase for both the frontend and backend components, simplifying development and deployment.
Frontend for Signing up
Create the Sign Up Page
First, create a new file called page.tsx inside the app/signup directory. This file will render the Sign Up component.
import { Signup } from "@/components/Signup";
export default function SignUpPage() {  return <Signup />;}
Create the Sign Up Component
Next, create a new file called Signup.tsx inside the components directory. This file will contain the Sign Up component.
"use client"; // Mark this component as a client componentimport axios from "axios";import { useRouter } from "next/router";import { ChangeEventHandler, useState } from "react";
export function Signup() {  const [username, setUsername] = useState("");  const [password, setPassword] = useState("");  const router = useRouter();
  return (    <div className="h-screen flex justify-center flex-col">      <div className="flex justify-center">        <div className="block max-w-sm p-6 bg-white border border-gray-200 rounded-lg shadow hover:bg-gray-100">          <div>            <div className="px-10">              <div className="text-3xl font-extrabold">Sign up</div>            </div>            <div className="pt-2">              <LabelledInput                onChange={(e) => {                  setUsername(e.target.value);                }}                label="Username"                placeholder="harkirat@gmail.com"              />              <LabelledInput                onChange={(e) => {                  setPassword(e.target.value);                }}                label="Password"                type={"password"}                placeholder="123456"              />              <button                onClick={async () => {                  const response = await axios.post("<http://localhost:3000/api/user>", {                    username,                    password,                  });                  router.push("/");                }}                type="button"                className="mt-8 w-full text-white bg-gray-800 focus:ring-4 focus:ring-gray-300 font-medium rounded-lg text-sm px-5 py-2.5 me-2 mb-2"              >                Sign up              </button>            </div>          </div>        </div>      </div>    </div>  );}
function LabelledInput({ label, placeholder, type, onChange }: LabelledInputType) {  return (    <div>      <label className="block mb-2 text-sm text-black font-semibold pt-4">{label}</label>      <input        onChange={onChange}        type={type || "text"}        id="first_name"        className="bg-gray-50 border border-gray-300 text-gray-900 text-sm rounded-lg focus:ring-blue-500 focus:border-blue-500 block w-full p-2.5"        placeholder={placeholder}        required      />    </div>  );}
interface LabelledInputType {  label: string;  placeholder: string;  type?: string;  onChange: ChangeEventHandler<HTMLInputElement>;}
In this component, we’re using the useState hook to manage the state of the username and password fields. We’re also using the useRouter hook from Next.js to navigate to the landing page (/) after a successful sign-up.
The Signup component renders a form with two input fields (username and password) and a “Sign up” button. When the user clicks the “Sign up” button, an onClick handler is triggered, which sends a POST request to the /api/user route with the username and password data.
If the sign-up is successful, the user is redirected to the landing page (/) using the router.push method.
Create the Backend Route
Now, let’s create the backend route to handle the sign-up request. Inside the app/api/user directory, create a new file called route.ts (or route.js for JavaScript).
import { NextResponse } from 'next/server';
export async function POST(request: Request) {  const { username, password } = await request.json();
  // Here, you would typically perform validation and store the user data in a database  // For simplicity, we'll just log the username and password to the console  console.log('Username:', username);  console.log('Password:', password);
  return NextResponse.json({ message: 'Sign up successful' });}
In this example, we’re defining a POST route that accepts the username and password data from the client. In a real-world scenario, you would typically perform validation and store the user data in a database. For simplicity, we’re just logging the username and password to the console.
After implementing the backend route, you should be able to sign up by entering a username and password on the Sign Up page. When you click the “Sign up” button, you should see the username and password logged in the console, and you should be redirected to the landing page (
/).
Backend for signing up
- Navigate to the API Route File
First, navigate to the app/api/user/route.ts file. This is where we’ll define our API routes related to user authentication.
- Import Required Dependencies
At the top of the file, import the necessary dependencies from Next.js:
import { NextRequest, NextResponse } from 'next/server';- Define the POST Route
Next, define the POST route by exporting an async function named POST. This function will handle the incoming POST requests to the /api/user route.
export async function POST(req: NextRequest) {  const body = await req.json();
  return NextResponse.json({ username: body.username, password: body.password });}
In this code:
- The
POSTfunction receives aNextRequestobject (req) as a parameter, which represents the incoming HTTP request. - We use the
req.json()method to parse the request body as JSON data and store it in thebodyvariable. - Finally, we return a
NextResponseobject with theusernameandpasswordproperties from the request body as JSON data.
Here’s the complete app/api/user/route.ts file:
import { NextRequest, NextResponse } from 'next/server';
export async function POST(req: NextRequest) {  const body = await req.json();
  return NextResponse.json({ username: body.username, password: body.password });}
With this implementation, when a POST request is sent to the /api/user route with a JSON payload containing username and password properties, the server will respond with a JSON object containing the same username and password values.
For example, if you send a POST request with the following JSON payload:
{ "username": "example@email.com", "password": "mypassword"}The server will respond with:
{ "username": "example@email.com", "password": "mypassword"}To conclude, in the next lecture, we will dive deeper into building full-stack applications with Next.js. We will explore integrating databases, implementing better fetching techniques, using the Prisma ORM, and leveraging server-side capabilities. This will equip us with the knowledge and skills necessary to build robust, scalable, and secure full-stack applications using Next.js.