Week 25.1 Integration and End-to-End Testing
In this lecture, Harkirat covers integration and end-to-end testing. He explains the prerequisites for integration tests, including setting up databases and bootstrapping tests with Vitest. Harkirat explores test setup/teardown functions and integrating tests with CI/CD pipelines. He also introduces end-to-end testing using Cypress for simulating real-user scenarios.
Integration and End-to-End Testing
In this section, we’ll explore integration and end-to-end testing, which are essential for ensuring that different components of your application work together correctly and that the application behaves as expected from a user’s perspective.
Unit Testing Recap
Before diving into integration and end-to-end testing, let’s quickly recap unit testing. Unit tests focus on testing individual units or components of your application in isolation. In the provided example from the https://github.com/100xdevs-cohort-2/week-24-testing/tree/main/5-express-vitest-prisma repository, we used concepts like mocking, mockResolvedValue, and spying to create unit tests for a simple Express app.
Here’s the code snippet from the example:
app.post("/sum", async (req, res) => {    const a = req.body.a;    const b = req.body.b;
    if (a > 1000000 || b > 1000000) {        return res.status(422).json({            message: "Sorry we dont support big numbers"        });    }    const result = a + b;
    const request = await prismaClient.request.create({        data: {            a: a,            b: b,            answer: result,            type: "Sum"        }    });
    res.json({ answer: result, id: request.id });});
And here’s an example unit test:
import { it, describe, expect, vi } from "vitest";import { app } from "../index";import request from "supertest";import { prismaClient } from '../__mocks__/db';
// mockReturnValuevi.mock("../db");
describe("Tests the sum function", () => {    it("Should return 3 when 1 + 2", async () => {        prismaClient.request.create.mockResolvedValue({            id: 1,            answer: 3,            type: "Sum",            a: 1,            b: 2        });
        vi.spyOn(prismaClient.request, "create");
        const res = await request(app).post("/sum").send({            a: 1,            b: 2        });
        expect(prismaClient.request.create).toHaveBeenCalledWith({            data: {                a: 1,                b: 2,                type: "Sum",                answer: 3            }        });
        expect(res.body.answer).toBe(3);        expect(res.body.id).toBe(1);        expect(res.statusCode).toBe(200);    });
    it("Should fail when a number is too big", async () => {        const res = await request(app).post("/sum").send({            a: 1000000000000,            b: 2        });
        expect(res.body.message).toBe("Sorry we dont support big numbers");        expect(res.statusCode).toBe(422);    });});
In this example, we’re mocking the prismaClient.request.create function to return a predefined value, and we’re using spies to ensure that the function is called with the correct input values. We’re also testing the application’s behavior when the input values are too large.
While unit tests are essential for testing individual components, they don’t provide a complete picture of how the application behaves when all components are integrated and working together. This is where integration and end-to-end testing come into play.
Integration Tests
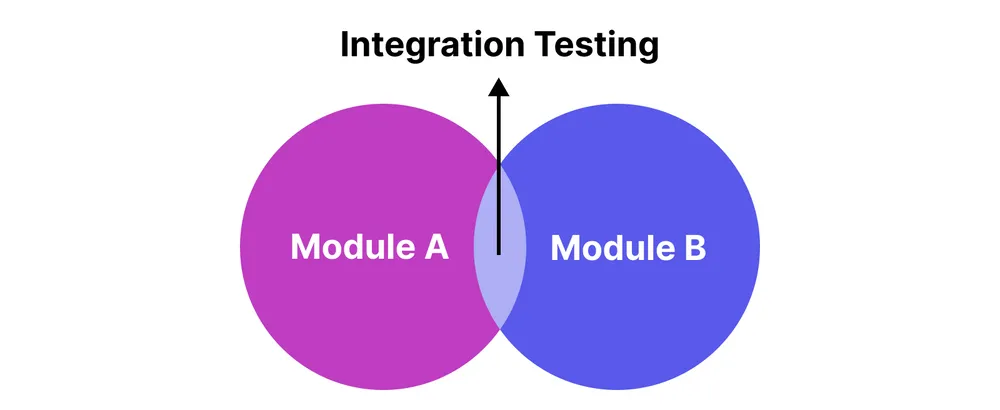
Integration tests are a crucial part of the testing process as they ensure that different components of your application work together correctly. Unlike unit tests, which focus on testing individual units or components in isolation, integration tests involve testing the integration between multiple components, including external services and dependencies.
Why Integration Tests?
While unit tests are great for testing the functionality of individual components, they often mock out external services and dependencies. This approach can lead to situations where the application works correctly in isolation but fails when integrated with other components or external services. Integration tests help catch these types of issues by testing the application in a more realistic environment, where all components are integrated and working together.
How Integration Tests Work
In integration tests, you typically start all the necessary external services and dependencies before running the tests. This could include starting a database, a message queue, a cache server, or any other external service that your application relies on. Instead of mocking out these services, you make actual calls to them during the test execution.
Here’s a high-level overview of the integration testing process:
- Set up the environment: Before running the tests, you need to set up the environment by starting all the required external services and dependencies. This could involve running Docker containers, starting local instances of databases or message queues, or even setting up cloud-based services.
- Run the application: Start your application in a test environment, ensuring that it connects to the external services and dependencies you’ve set up.
- Execute the tests: Run your integration tests, which should interact with your application and the external services as if they were in a production environment.
- Tear down the environment: After the tests have completed, you should tear down the environment by stopping the external services and dependencies, and cleaning up any resources used during the testing process.
Downsides of Integration Tests
While integration tests provide a more realistic testing environment and can catch issues that unit tests might miss, they also come with some downsides:
- Slower execution: Integration tests are generally slower to execute than unit tests because they involve setting up and tearing down external services and dependencies, which can be time-consuming.
- Increased complexity: Setting up and managing the external services and dependencies required for integration tests can add complexity to your testing setup. This complexity can increase as the number of external services and dependencies grows.
- Local development setup: Developers may need to set up a local development environment that mimics the integration testing environment, which can be challenging and time-consuming, especially for complex applications with many external dependencies.
Despite these downsides, integration tests are essential for ensuring that your application works correctly when all components are integrated and working together. They provide a higher level of confidence in your application’s overall functionality and can catch issues that might be missed by unit tests alone.
Pre-requisites of Writing Integration Tests
Before writing integration tests, it’s essential to set up the necessary infrastructure and code to bring up the external services, seed data, and tear down the services when the test suite completes. This setup ensures that your integration tests run in a controlled and consistent environment, mimicking the production-like conditions as closely as possible.
In this section, we’ll walk through the steps to set up an Express application with Prisma, which we’ll use as the basis for writing integration tests.
Setting up the Express + Prisma App
- Initialize a new Node.js project:
npm init -ynpx tsc --init- Update the
tsconfig.jsonfile to set therootDirandoutDirproperties:
"rootDir": "src","outDir": "dist"- Install the required dependencies:
npm install express @types/express prisma- Initialize Prisma:
npx prisma init- Update the
schema.prismafile with the necessary models:
model Request {  id          Int     @id @default(autoincrement())  a           Int  b           Int  answer      Int  type        Type}
enum Type { ADD MUL}- Generate the Prisma client:
npx prisma generate- Create a
db.tsfile to export the Prisma client:
import { PrismaClient } from "@prisma/client";
export const prismaClient = new PrismaClient();- Write the Express logic in
index.ts:
import express from "express";import { prismaClient } from "./db";
export const app = express();
app.use(express.json());
app.post("/sum", async (req, res) => {    const a = req.body.a;    const b = req.body.b;
    if (a > 1000000 || b > 1000000) {        return res.status(422).json({            message: "Sorry we dont support big numbers"        });    }    const result = a + b;
    const request = await prismaClient.request.create({        data: {            a: a,            b: b,            answer: result,            type: "ADD"        }    });
res.json({ answer: result, id: request.id });});- Create a
bin.tsfile to start the server and listen on a port:
import { app } from "./index";
app.listen(3000);- Try running the app locally:
tsc -bnode dist/bin.jsYou’ll notice that the request fails because we haven’t started the database locally yet. This is expected behavior, as we haven’t set up the necessary infrastructure for running integration tests.
Starting the Database
In the previous section, we set up an Express application with Prisma, but we didn’t start the database locally. In this section, we’ll explore how to start a database locally and interact with our backend to perform a manual integration test.
Starting a PostgreSQL Database with Docker
One of the easiest ways to start a PostgreSQL database locally is by using Docker. Follow these steps:
- Make sure Docker is running on your machine.
- Run the following command to start a PostgreSQL container:
docker run -p 5432:5432 -e POSTGRES_PASSWORD=mysecretpassword -d postgresThis command starts a PostgreSQL container and maps the container’s port 5432 to the host’s port 5432. It also sets the POSTGRES_PASSWORD environment variable to mysecretpassword.
- Update the
.envfile with the database connection URL:
DATABASE_URL="postgresql://postgres:mysecretpassword@localhost:5432/postgres"- Migrate the database schema:
npx prisma migrate dev- Generate the Prisma client:
npx prisma generateNow, your backend should be able to connect to the PostgreSQL database running in the Docker container.
Sending a Request and Verifying Data
- Send a request to your backend using a tool like Postman or cURL. For example, using Postman, you can send a POST request to
http://localhost:3000/sumwith the following request body:
{ "a": 2, "b": 3}You should receive a response similar to the following:
{ "answer": 5, "id": 1}- Verify that the data was inserted into the database by opening the Prisma Studio:
npx prisma studioIn the Prisma Studio, you should see a new record in the Request table with the values you sent in the request.
Cleaning Up
After verifying that the integration works as expected, you can stop and remove the Docker container:
- List the running containers:
docker ps- Copy the container ID of the PostgreSQL container.
- Stop and remove the container:
docker kill <container_id>docker rm <container_id>What we’ve done so far is a manual integration test. We started the database, sent a request to our backend, verified that the data was stored correctly, and then cleaned up the database container.
Bootstrapping Integration Tests in Vitest
In this section, we’ll set up the infrastructure required to run integration tests using Vitest. We’ll create a Docker Compose file to start the necessary external services (in this case, a PostgreSQL database), and we’ll write scripts to automate the process of starting the services, seeding data, running tests, and tearing down the services after the tests complete.
Setting up Vitest
- Install Vitest as a development dependency:
npm install vitestCreating a Docker Compose File
- Create a
docker-compose.ymlfile in the root of your project with the following content:
version: '3.8'services: db: image: postgres restart: always environment: - POSTGRES_USER=postgres - POSTGRES_PASSWORD=mysecretpassword ports: - '5432:5432'This Docker Compose file defines a single service called db that runs a PostgreSQL container. It sets the POSTGRES_USER and POSTGRES_PASSWORD environment variables and maps the container’s port 5432 to the host’s port 5432.
Creating Helper Scripts
- Create a
src/tests/helpers/reset-db.tsfile to reset the database before each test:
import { PrismaClient } from '@prisma/client'
const prisma = new PrismaClient()
export default async () => {  await prisma.$transaction([    prisma.request.deleteMany(),  ])}
This script uses the Prisma client to delete all records from the Request table, effectively resetting the database before each test.
- Create a
scripts/run-integration.shscript to start the Docker Compose services and run the integration tests:
docker-compose up -d- Download the
wait-for-it.shscript from thevishnubob/wait-for-itrepository and save it asscripts/wait-for-it.sh:
curl <https://raw.githubusercontent.com/vishnubob/wait-for-it/master/wait-for-it.sh> -o scripts/wait-for-it.shNote: On macOS, you might need to install coreutils and alias timeout to gtimeout for the wait-for-it.sh script to work correctly. You can do this by running the following commands:
brew install coreutils && alias timeout=gtimeoutRefer to this issue for more information.
- Make the scripts executable:
chmod +x scripts/*- Update the
run-integration.shscript to wait for the database to be ready, migrate the database schema, run the tests, and tear down the Docker Compose services:
docker-compose up -decho '🟡 - Waiting for database to be ready...'./wait-for-it.sh "postgresql://postgres:mysecretpassword@localhost:5432/postgres" -- echo '🟢 - Database is ready!'npx prisma migrate dev --name initnpm run testdocker-compose down- Update the
package.jsonfile to include a new script for running integration tests:
"scripts": { "test": "vitest", "test:integration": "./scripts/run-integration.sh"},With this setup, you can run the integration tests by executing the following command:
npm run test:integrationThis command will start the Docker Compose services (in this case, the PostgreSQL database), wait for the database to be ready, migrate the database schema, run the tests, and then tear down the Docker Compose services after the tests complete.
Adding Integration Tests
Now that we have set up the infrastructure for running integration tests, it’s time to write the actual tests. In this section, we’ll add an integration test for the /sum endpoint of our Express application.
Installing Dependencies
- Install Supertest as a development dependency:
npm install -D supertest @types/supertestSupertest is a library that provides a high-level abstraction for testing HTTP servers, making it easy to test Express routes and middleware.
Writing the Integration Test
- Create a new file
src/tests/sum.test.tsand add the following code:
import { describe, expect, it } from "vitest";import { app } from "..";import request from "supertest";
describe("POST /sum", () => {    it("should sum add 2 numbers", async () => {        const { status, body } = await request(app).post('/sum').send({            a: 1,            b: 2        });        expect(status).toBe(200);        expect(body).toEqual({ answer: 3, id: expect.any(Number) });    });});
In this test, we’re using Supertest to send a POST request to the /sum endpoint with the request body { a: 1, b: 2 }. We then assert that the response status code is 200 (OK) and that the response body contains an answer property with the value 3 and an id property with a numeric value.
Running the Integration Tests
- Run the integration tests by executing the following command:
npm run testYou should see output similar to the following:
 ✓ POST /sum › should sum add 2 numbers (10ms)
Test Files  1 passed (1)     Tests  1 passed (1)      Time  0.08s (in thread 0ms, allocated 0b)
This output indicates that the integration test passed successfully.
Resetting the Database
In the previous section, we created a reset-db.ts helper script to reset the database before each test. To use this script, we need to import it and call the reset function before each test.
- Update the
sum.test.tsfile to import thereset-dbfunction and call it before each test:
import { describe, expect, it, beforeEach } from "vitest";import { app } from "..";import request from "supertest";import reset from "./helpers/reset-db";
describe("POST /sum", () => {    beforeEach(async () => {        await reset();    });
    it("should sum add 2 numbers", async () => {        const { status, body } = await request(app).post('/sum').send({            a: 1,            b: 2        });        expect(status).toBe(200);        expect(body).toEqual({ answer: 3, id: expect.any(Number) });    });});
In this updated code, we import the reset function from ./helpers/reset-db and call it using beforeEach. This ensures that the database is reset before each test case, providing a clean slate for each test run.
By writing integration tests and resetting the database before each test, you can ensure that your application works correctly when integrated with external services like databases, without relying on mocks or stubs. This approach provides a higher level of confidence in your application’s overall functionality and helps catch issues that might be missed by unit tests alone.
beforeEach and beforeAll Functions
In testing frameworks like Vitest, the beforeEach and beforeAll functions are used to set up and tear down the test environment before and after running tests. These functions are particularly useful when you need to perform certain actions before each test case or before the entire test suite.
beforeEach
The beforeEach function is called before each test case within a describe block. It’s commonly used to set up the test environment or reset any state that might be affected by the previous test case.
Here’s an example of how you can use beforeEach to clear the database before each test case:
import { beforeEach, describe, expect, it } from "vitest";import { app } from "..";import request from "supertest";import resetDb from "./helpers/reset-db";
describe("POST /sum", () => {    beforeEach(async () => {        console.log("clearing db");        await resetDb();    });
    it("should sum add 2 numbers", async () => {        const { status, body } = await request(app).post('/sum').send({            a: 1,            b: 2        });        expect(status).toBe(200);        expect(body).toEqual({ answer: 3, id: expect.any(Number) });    });
    it("should sum add 2 negative numbers", async () => {        const { status, body } = await request(app).post('/sum').send({            a: -1,            b: -2        });        expect(status).toBe(200);        expect(body).toEqual({ answer: -3, id: expect.any(Number) });    });});
In this example, the beforeEach function is called before each test case within the "POST /sum" describe block. It calls the resetDb function to clear the database before each test case, ensuring that each test case starts with a clean slate.
beforeAll
The beforeAll function is called once before all the test cases within a describe block. It’s useful when you need to perform setup tasks that are expensive or time-consuming, and you want to avoid repeating them for each test case.
Here’s an example of how you can use beforeAll to clear the database before all the test cases in a describe block:
import { beforeAll, beforeEach, describe, expect, it } from "vitest";import { app } from "..";import request from "supertest";import resetDb from "./helpers/reset-db";
describe("POST /sum", () => {    beforeAll(async () => {        console.log("clearing db");        await resetDb();    });
    it("should sum add 2 numbers", async () => {        const { status, body } = await request(app).post('/sum').send({            a: 1,            b: 2        });        expect(status).toBe(200);        expect(body).toEqual({ answer: 3, id: expect.any(Number) });    });
    it("should sum add 2 negative numbers", async () => {        const { status, body } = await request(app).post('/sum').send({            a: -1,            b: -2        });        expect(status).toBe(200);        expect(body).toEqual({ answer: -3, id: expect.any(Number) });    });});
In this example, the beforeAll function is called once before all the test cases within the "POST /sum" describe block. It calls the resetDb function to clear the database before running any of the test cases.
The choice between beforeEach and beforeAll depends on your specific testing requirements and the nature of the setup or teardown tasks you need to perform. If you need to reset the test environment for each test case, beforeEach is the appropriate choice. If you have expensive setup tasks that can be shared across all test cases within a describe block, beforeAll can be more efficient.
CI/CD Pipeline
Setting up a Continuous Integration and Continuous Deployment (CI/CD) pipeline is crucial for ensuring that your application is thoroughly tested and that any issues are caught early in the development process. In this section, we’ll create a GitHub Actions workflow that runs our integration tests whenever a pull request is opened or changes are pushed to the main branch.
Creating the GitHub Actions Workflow
- Create a new directory called
.github/workflowsin your project repository. - Inside the
workflowsdirectory, create a new file calledtest.ymlwith the following content:
name: CI/CD Pipeline
on:  push:    branches:      - main  pull_request:    branches:      - main
jobs:  test:    runs-on: ubuntu-latest
    steps:    - name: Checkout code      uses: actions/checkout@v2
    - name: Set up Docker Buildx      uses: docker/setup-buildx-action@v2
    - name: Set up Docker Compose      uses: docker/setup-qemu-action@v2
    - name: Ensure Docker Compose is available      run: docker-compose version
    - name: Copy .env.example to .env      run: cp ./1-integration-test/.env.example ./1-integration-test/.env
    - name: Run integration script      run: cd 1-integration-test && npm run test:integration
This workflow file defines a job called test that runs on the latest Ubuntu environment provided by GitHub Actions. Here’s what each step does:
Checkout code: Checks out the repository code.Set up Docker Buildx: Sets up the Docker Buildx action, which is required for running Docker containers on GitHub Actions.Set up Docker Compose: Sets up the QEMU action, which is required for running Docker Compose on GitHub Actions.Ensure Docker Compose is available: Verifies that Docker Compose is available and ready to use.Copy .env.example to .env: Copies the.env.examplefile to.envin the1-integration-testdirectory, which is required for running the integration tests.Run integration script: Navigates to the1-integration-testdirectory and runs thenpm run test:integrationscript, which starts the Docker Compose services, runs the integration tests, and tears down the services after the tests complete.
- Create a
.env.examplefile in the1-integration-testdirectory with the following content:
DATABASE_URL="postgresql://postgres:mysecretpassword@localhost:5432/postgres"This file contains the environment variables required for running the integration tests. In this case, it specifies the connection URL for the PostgreSQL database.
Triggering the CI/CD Pipeline
Once the workflow file and the .env.example file are committed and pushed to your repository, the CI/CD pipeline will automatically trigger whenever a pull request is opened against the main branch or changes are pushed to the main branch.
You can view the progress and results of the pipeline by navigating to the “Actions” tab in your repository on GitHub.
By integrating testing and coverage in your CI/CD pipeline, you can catch issues early, ensure that your codebase is thoroughly tested, and maintain a high level of code quality throughout the development process.
End-to-End Tests
Until now, we have focused on testing the backend components of our application using unit tests and integration tests. However, to ensure that our application works correctly from an end-user’s perspective, we need to perform end-to-end (E2E) tests. E2E tests simulate real-world user scenarios by testing the entire application flow, from the user interface to the backend services.
What are End-to-End Tests?
End-to-end tests involve spinning up a browser and interacting with the application as an end-user would. This includes actions such as navigating to different pages, filling out forms, clicking buttons, and verifying that the expected behavior occurs. E2E tests provide a higher level of confidence in the overall functionality of the application, as they test the integration between the frontend and backend components.
Frameworks for End-to-End Testing
There are several frameworks available for performing end-to-end testing in web applications. Here are some popular options:
- Cypress: Cypress is a modern end-to-end testing framework that runs directly in the browser. It provides a simple and powerful API for writing tests, and its time-traveling debugger allows you to debug failed tests visually. Cypress also offers features like automatic waiting, network stubbing, and parallelization.
- Playwright: Playwright is a Python-based end-to-end testing framework developed by Microsoft. It supports multiple browsers (Chromium, Firefox, and WebKit) and provides a high-level API for automating browser interactions.
- Nightwatch.js: Nightwatch.js is a Node.js-based end-to-end testing framework that uses the W3C WebDriver API for browser automation. It supports multiple browsers and provides a simple and readable syntax for writing tests.
Cypress
Cypress is a modern end-to-end testing framework that makes it easy to write, run, and debug tests for web applications. In this section, we’ll set up Cypress and create a simple test for the https://app.100xdevs.com/ website.
Setting up the Project
- Initialize a new TypeScript project:
npm init -ynpx tsc --initmkdir src- Update the
tsconfig.jsonfile to set therootDirandoutDirproperties:
"rootDir": "./src","outDir": "./dist",- Install Cypress as a development dependency:
npm install cypress --save-devNote: If you encounter issues during the installation, make sure you have a compatible browser installed on your system. You can find the prerequisites for different operating systems in the Cypress documentation.
- Bootstrap Cypress:
npx cypress openThis command will open the Cypress Test Runner, which provides a graphical user interface for managing and running your tests. You can select the “default example” to start with and delete the 2-advanced-examples folder.
- Try running the existing “todo” test:
npx cypress run --browser chrome --headedThis command will run the “todo” test in a visible Chrome browser window.
Writing a Test for https://app.100xdevs.com/
- Update the
cypress/e2e/todo.cy.tsfile with the following test:
describe('Testing app', () => {  beforeEach(() => {    cy.visit('<https://app.100xdevs.com>')  })
  it('is able to log in', () => {    cy.contains('Login').should('exist')    cy.contains('Login').click()    cy.contains('Signin to your Account').should('exist', { timeout: 10000 })    cy.get('#email').type('harkirat.iitr@gmail.com');
    // Fill in the password field    cy.get('#password').type('123random');
    cy.get('button').eq(4).click()
    cy.contains('View Content').should("exist", {timeout: 10000})  })})
This test performs the following actions:
- Visits the
https://app.100xdevs.com/website before each test case. - Checks if the “Login” button exists and clicks it.
- Waits for the “Signin to your Account” text to appear (with a timeout of 10 seconds).
- Types the email address
harkirat.iitr@gmail.cominto the email input field. - Types the password
123randominto the password input field. - Clicks the fourth button on the page (assuming it’s the “Sign In” button).
- Waits for the “View Content” text to appear (with a timeout of 10 seconds).
- Run the test:
npx cypress run --browser chrome --headedThis command will run the test in a visible Chrome browser window, allowing you to observe the test execution.
By writing end-to-end tests with Cypress, you can simulate real-world user scenarios and ensure that your application works as expected from an end-user’s perspective. Cypress provides a powerful and user-friendly testing experience, with features like automatic waiting, time-traveling debugger, and easy-to-write assertions.
The provided reference (https://www.cypress.io/) offers more detailed documentation, examples, and guides for working with Cypress. As you continue to develop your application, you can expand your end-to-end test suite to cover more scenarios and ensure a high level of quality and reliability.