Week 22.2 Horizontal Scaling
In this lecture, Harkirat covers horizontal scaling techniques, focusing on Auto Scaling Groups (ASGs) in AWS. He provides a comprehensive walkthrough on implementing ASGs. Later he demonstrates how to test and validate ASG setups effectively. FInally he introduces Elastic Beanstalk.
Horizontal Scaling
Horizontal scaling, also known as scaling out, involves increasing the number of instances or servers to handle more load or traffic. This approach is essential for building scalable and resilient systems that can adapt to varying workloads. In this section, we will elaborate on the key concepts and mechanisms involved in horizontal scaling, particularly in the context of AWS (Amazon Web Services).
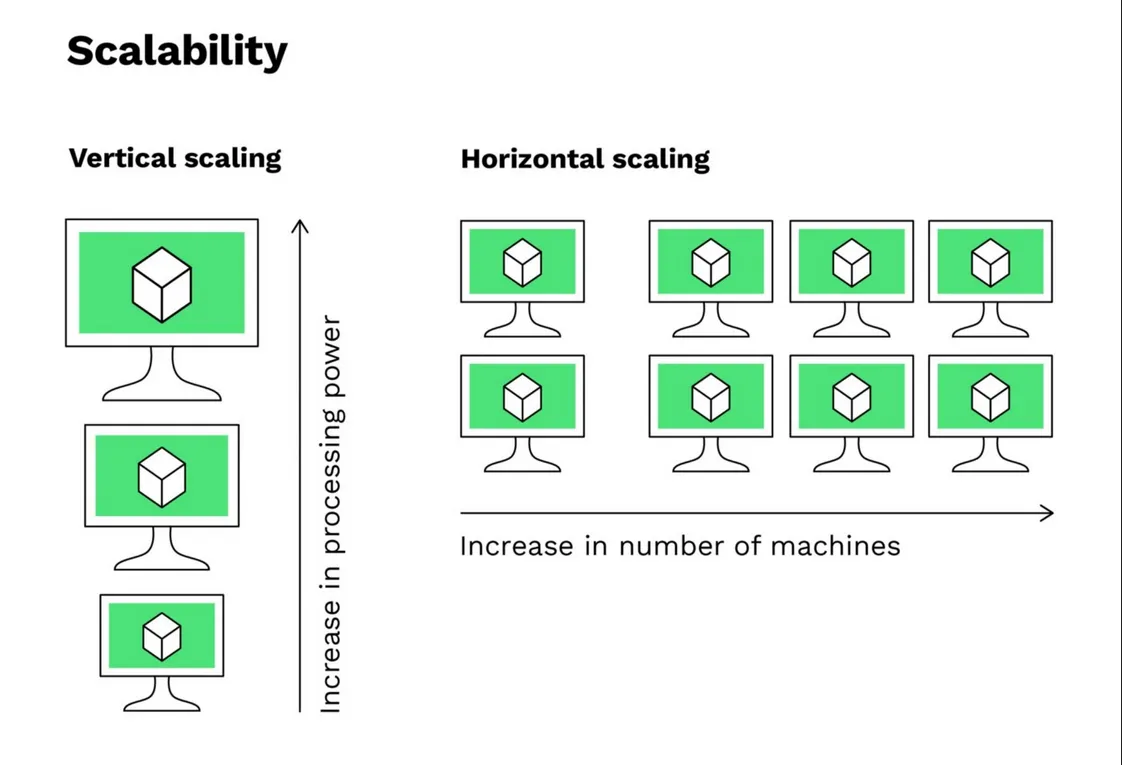
Horizontal scaling represents increasing the number of instances you have based on a metric to be able to support more load. This is typically achieved through the use of auto-scaling groups, which automatically adjust the number of instances based on predefined metrics such as CPU utilization, memory usage, or custom metrics.
AWS Auto Scaling Groups
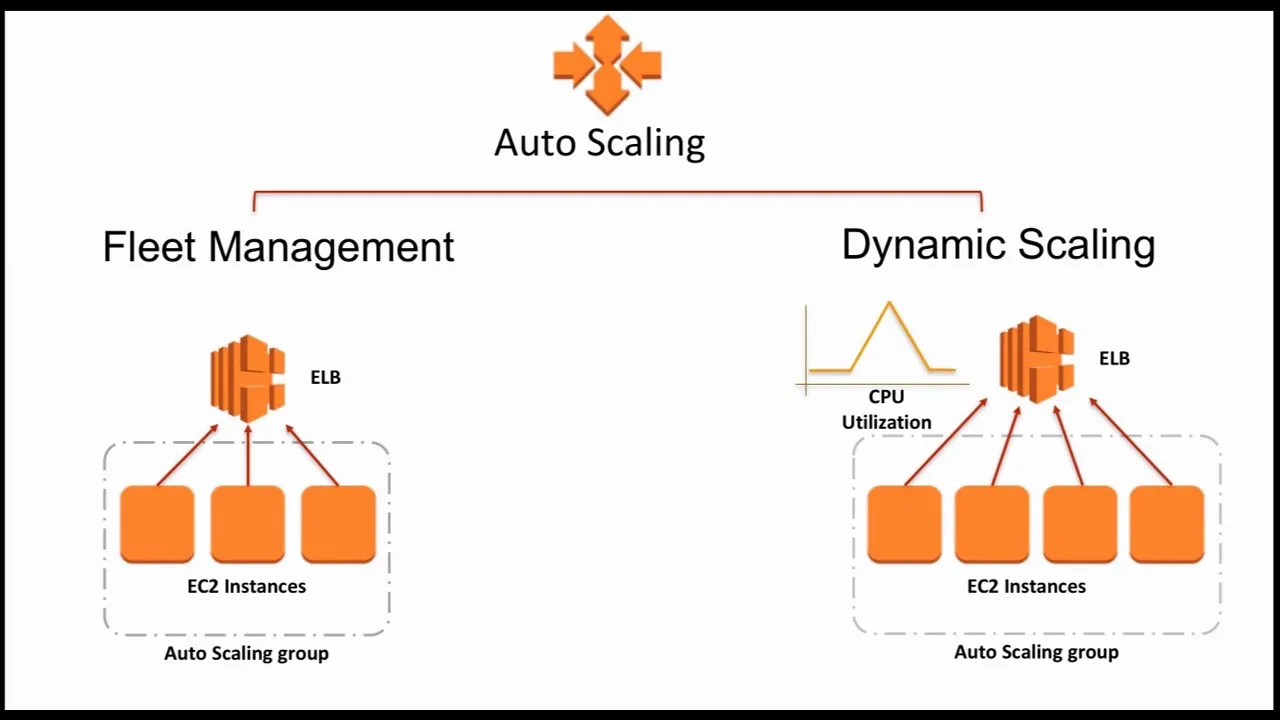
AWS provides a feature called Auto Scaling Groups, which allows you to automatically scale the number of EC2 (Elastic Compute Cloud) instances based on demand. This ensures that your application can handle varying loads without manual intervention.
Key Concepts
- Amazon Machine Images (AMIs): AMIs are pre-configured virtual machine images that serve as templates for launching new EC2 instances. They include the operating system, application server, and applications required to launch an instance. AMIs are essentially snapshots of a machine from which you can create more machines.
- Load Balancer: A load balancer acts as an entry point that distributes incoming traffic across multiple instances. It ensures high availability and reliability by forwarding requests to healthy instances within a target group. AWS provides fully managed load balancers, such as the Elastic Load Balancer (ELB), which automatically scales to handle incoming traffic.
- Target Groups: A target group is a logical grouping of EC2 instances that a load balancer can send requests to. Target groups allow you to manage and route traffic to specific sets of instances based on your application’s requirements.
- Launch Template: A launch template is a reusable configuration that defines the parameters required to launch new EC2 instances. It includes details such as the AMI ID, instance type, key pair, security groups, and other instance settings. Launch templates simplify the process of launching and managing instances.
Using Auto Scaling Groups (ASGs)
Auto Scaling Groups (ASGs) are a powerful feature in AWS that allows you to automatically scale your EC2 instances based on demand. This guide will walk you through the steps to set up and use ASGs for a Node.js application.
Option 1: Create an EC2 Instance and Build from Scratch
Step 1: Create an EC2 Instance
- Launch a new EC2 instance from the AWS Management Console or using the AWS CLI.
- Choose an Amazon Machine Image (AMI) based on your requirements (e.g., Ubuntu 20.04).
- Select an instance type that meets your application’s resource needs.
- Configure the instance details, such as the VPC, subnet, and security group.
- Review and launch the instance.
Step 2: Install Node.js
- Connect to your EC2 instance using SSH.
- Follow the instructions from the DigitalOcean guide to install Node.js on your Ubuntu 20.04 instance: How to Install Node.js on Ubuntu 20.04
Step 3: Clone the Repository
- On your EC2 instance, clone the provided repository:
git clone <https://github.com/100xdevs-cohort-2/week-22.git>Step 4: Create an Amazon Machine Image (AMI)
- In the AWS Management Console, navigate to the EC2 service.
- Right-click on your instance and select “Image” > “Create Image”.
- Provide a name and description for your AMI.
- Wait for the AMI creation process to complete.
Step 5: Create a Security Group
- In the AWS Management Console, navigate to the EC2 service.
- Go to the “Security Groups” section and create a new security group.
- Add the necessary inbound and outbound rules for your application (e.g., allow HTTP/HTTPS traffic, SSH access).
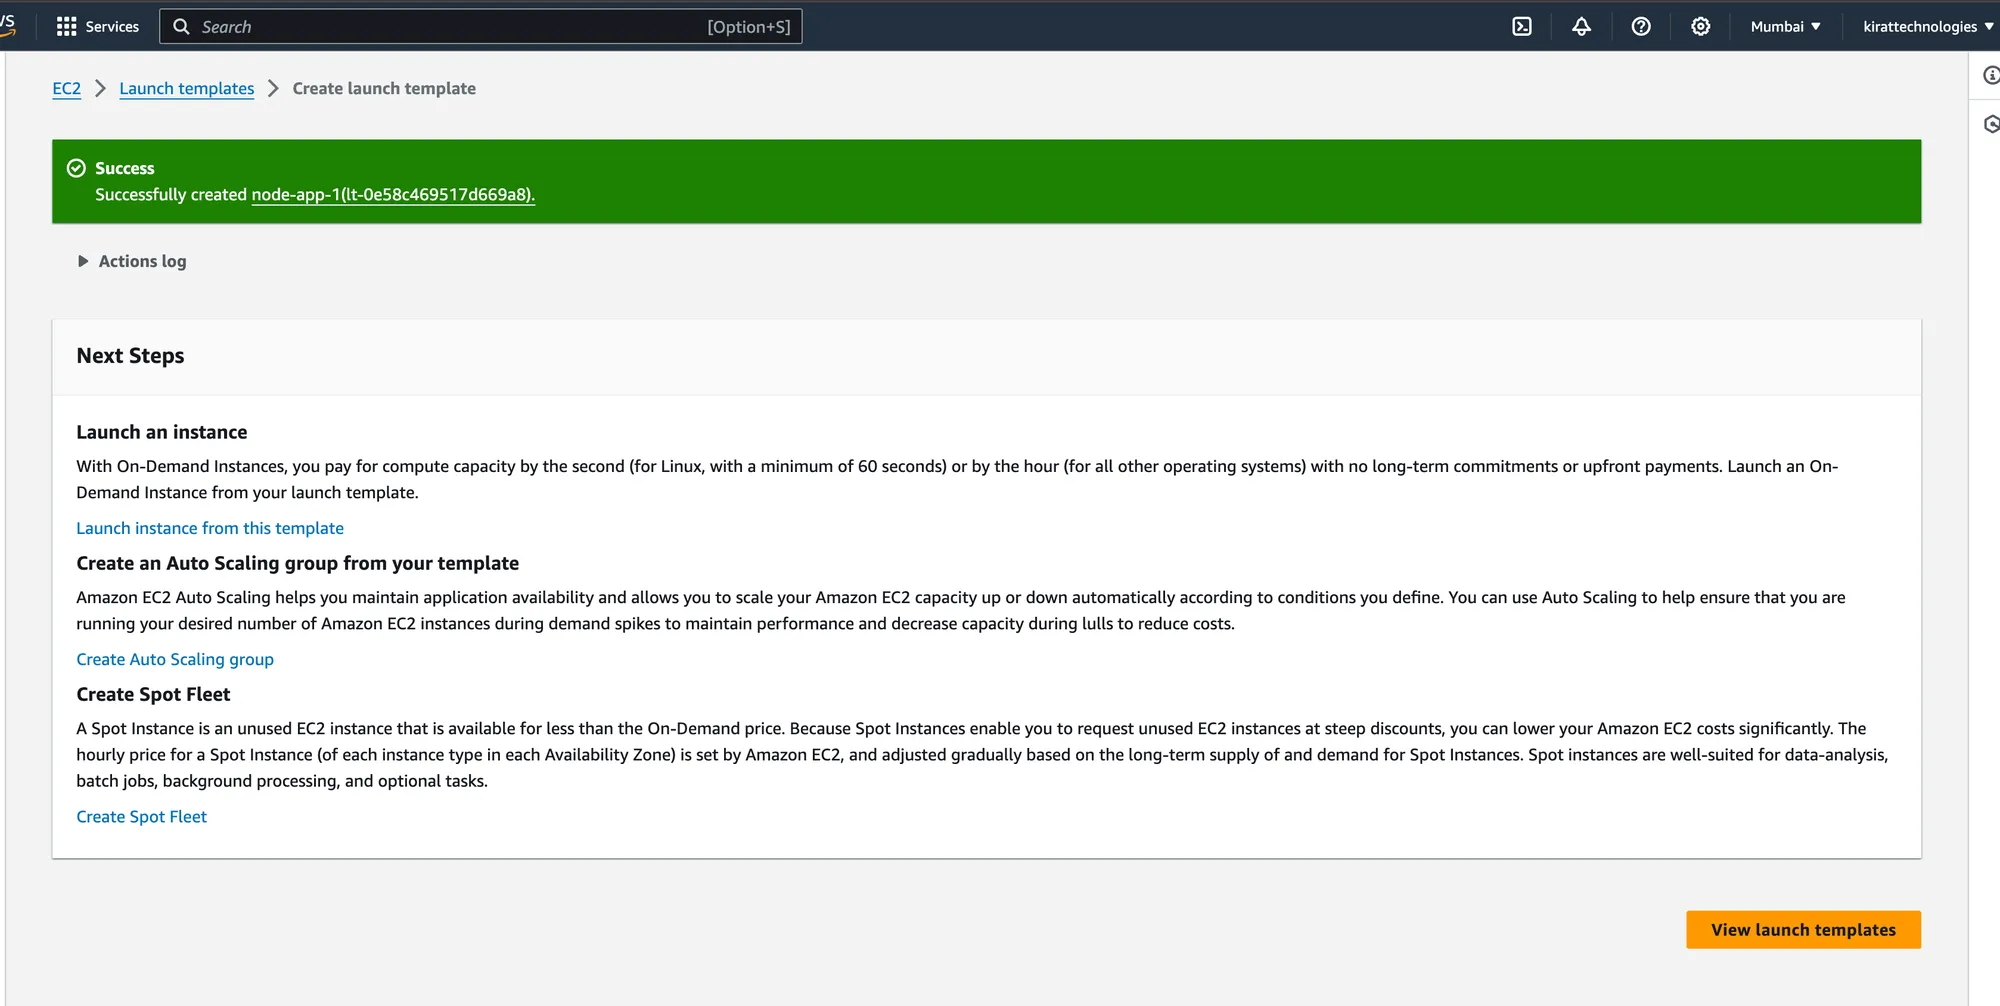
Step 6: Create a Launch Template
- In the AWS Management Console, navigate to the EC2 service.
- Go to the “Launch Templates” section and create a new launch template.
- Configure the launch template with the AMI you created earlier, the instance type, and the security group.
- Optionally, you can specify user data to run scripts or commands when the instances launch.
Step 7: Configure User Data
- In the launch template configuration, navigate to the “Advanced details” section.
- Paste the following user data script to install dependencies, start your Node.js application, and configure PM2 for process management:
#!/bin/bashexport PATH=$PATH:/home/ubuntu/.nvm/versions/node/v22.0.0/bin/echo "hi there before"echo "hi there after"npm install -g pm2cd /home/ubuntu/week-22pm2 start index.jspm2 savepm2 startup- You can check if the user data is working correctly by following the instructions in this StackOverflow answer: How to check whether my user data passing to EC2 instance is working
Step 8: Create an Auto Scaling Group
- In the AWS Management Console, navigate to the EC2 service.
- Go to the “Auto Scaling Groups” section and create a new Auto Scaling group.
- Select the launch template you created earlier.
- Configure the desired capacity, minimum capacity, and maximum capacity for your ASG.
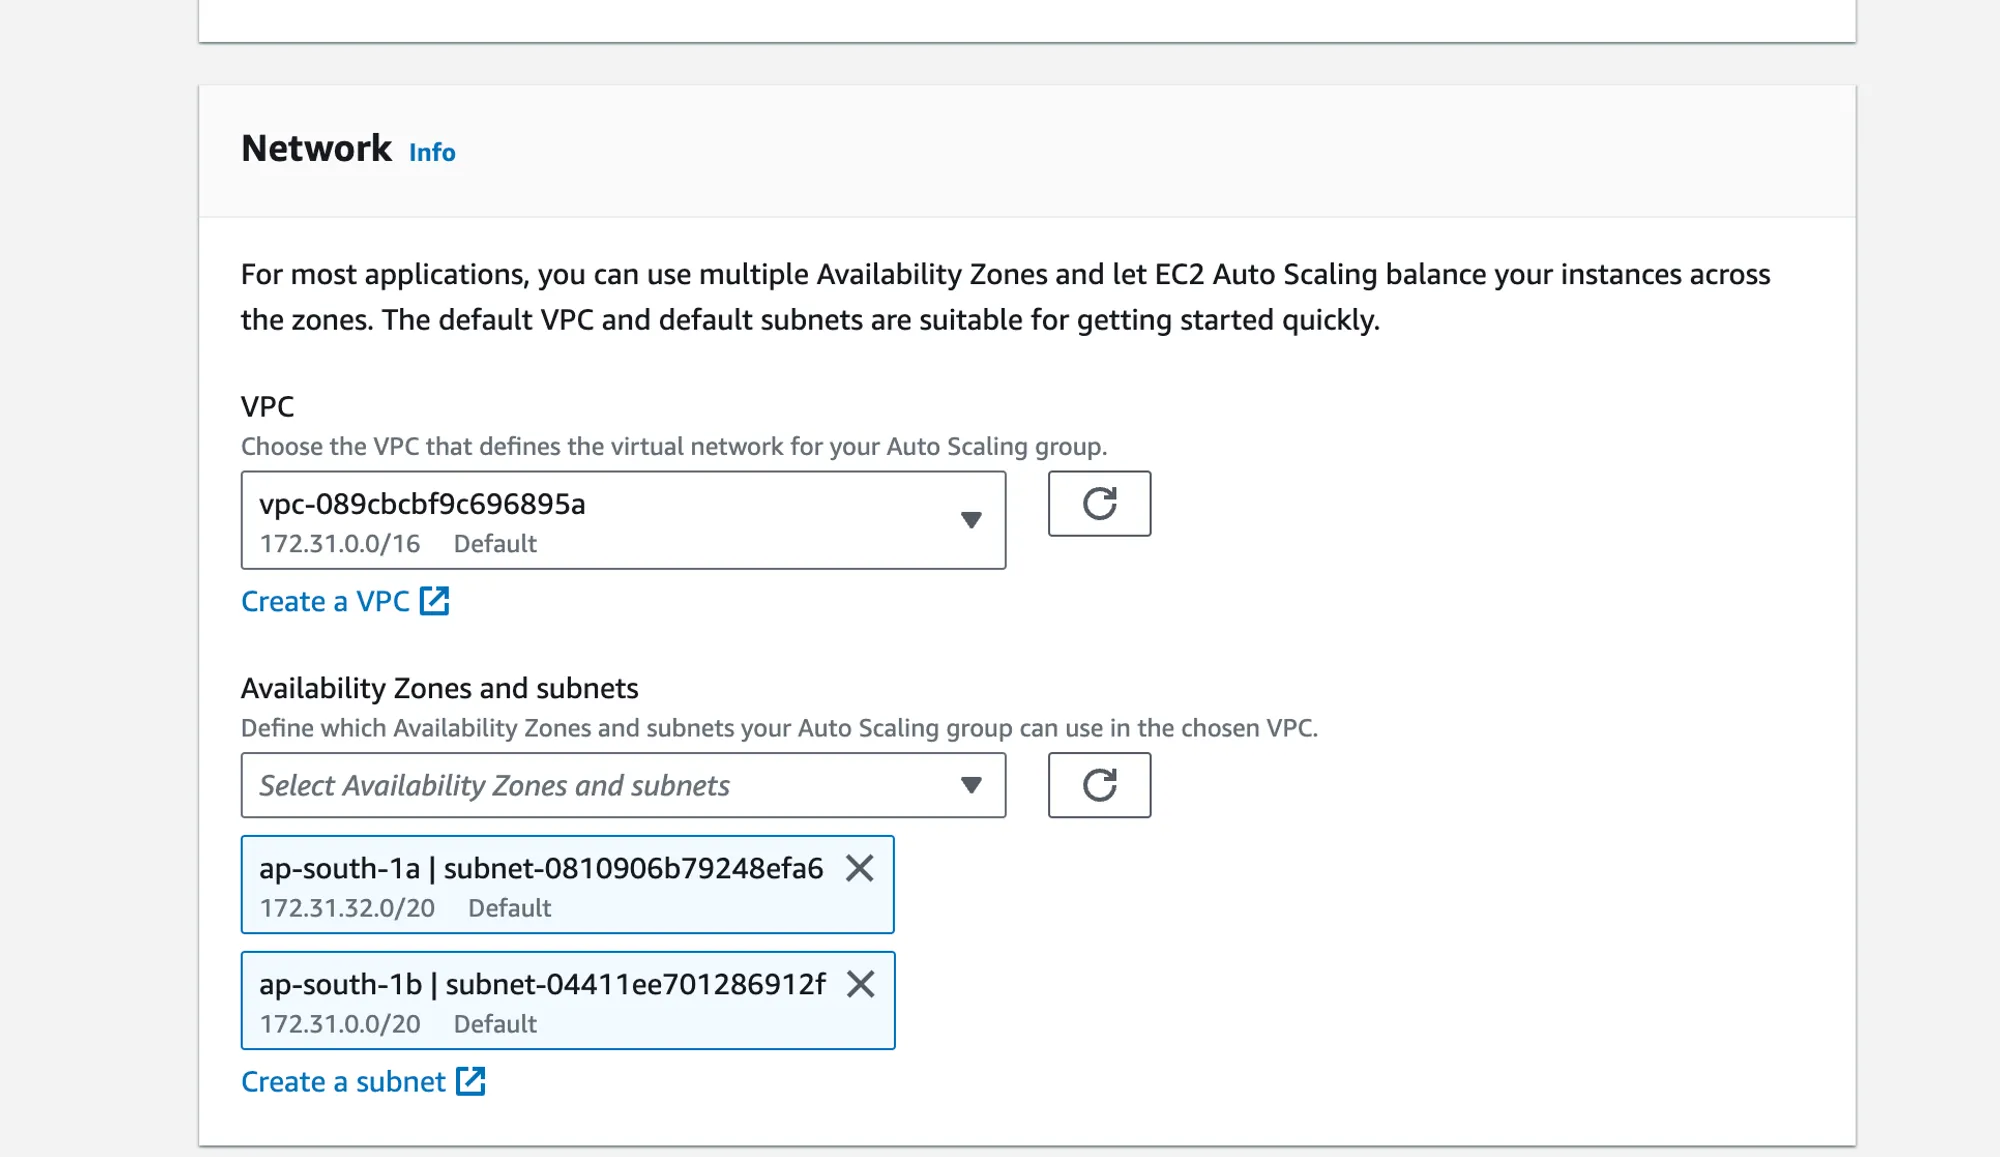
- Select the VPC and subnets where you want to launch the instances.
- Ensure that the ASG is set to balance instances across multiple Availability Zones for high availability.
Step 9: Create a Load Balancer
- In the AWS Management Console, navigate to the EC2 service.
- Go to the “Load Balancers” section and create a new Application Load Balancer (ALB) or a Network Load Balancer (NLB) depending on your requirements.
- Request an SSL/TLS certificate from AWS Certificate Manager (ACM) for your domain.
- Configure an HTTPS listener on your load balancer and associate it with the ACM certificate.
- Create a target group and attach it to your ASG.
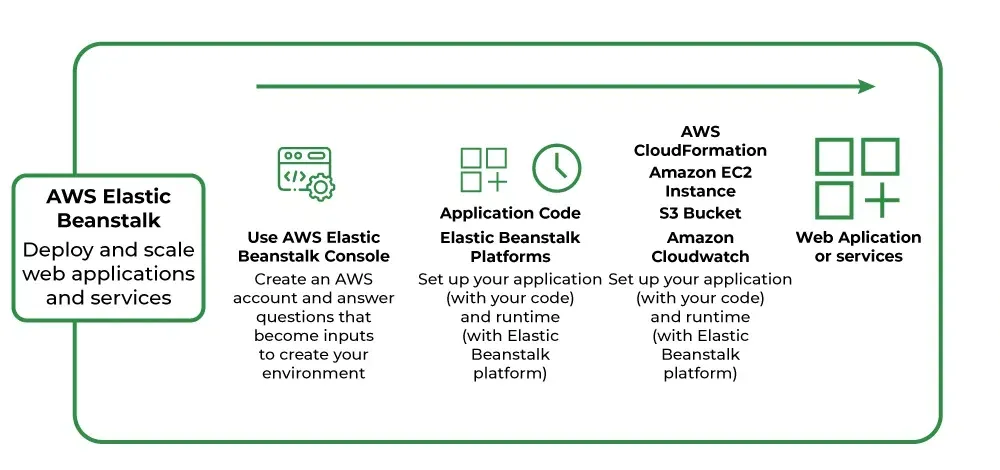
Option 2: Use AWS Elastic Beanstalk
Alternatively, you can use AWS Elastic Beanstalk, which provides a more streamlined and managed approach to deploying and scaling web applications.
Step 1: Create an Elastic Beanstalk Application
- In the AWS Management Console, navigate to the Elastic Beanstalk service.
- Create a new web application environment and choose the appropriate platform (e.g., Node.js) for your application.
- Upload your application code or provide the GitHub repository URL.
- Configure the environment settings, such as instance type, VPC, and load balancer.
Step 2: Deploy and Monitor
- Deploy your application to the Elastic Beanstalk environment.
- Monitor the health and performance of your application using the Elastic Beanstalk console or integrated monitoring tools.
Step 3: Configure Auto Scaling
- Elastic Beanstalk automatically provisions and manages an ASG for your application.
- You can configure auto-scaling settings, such as minimum and maximum instance counts, scaling policies, and metrics to trigger scaling events.
Additional Steps and Information
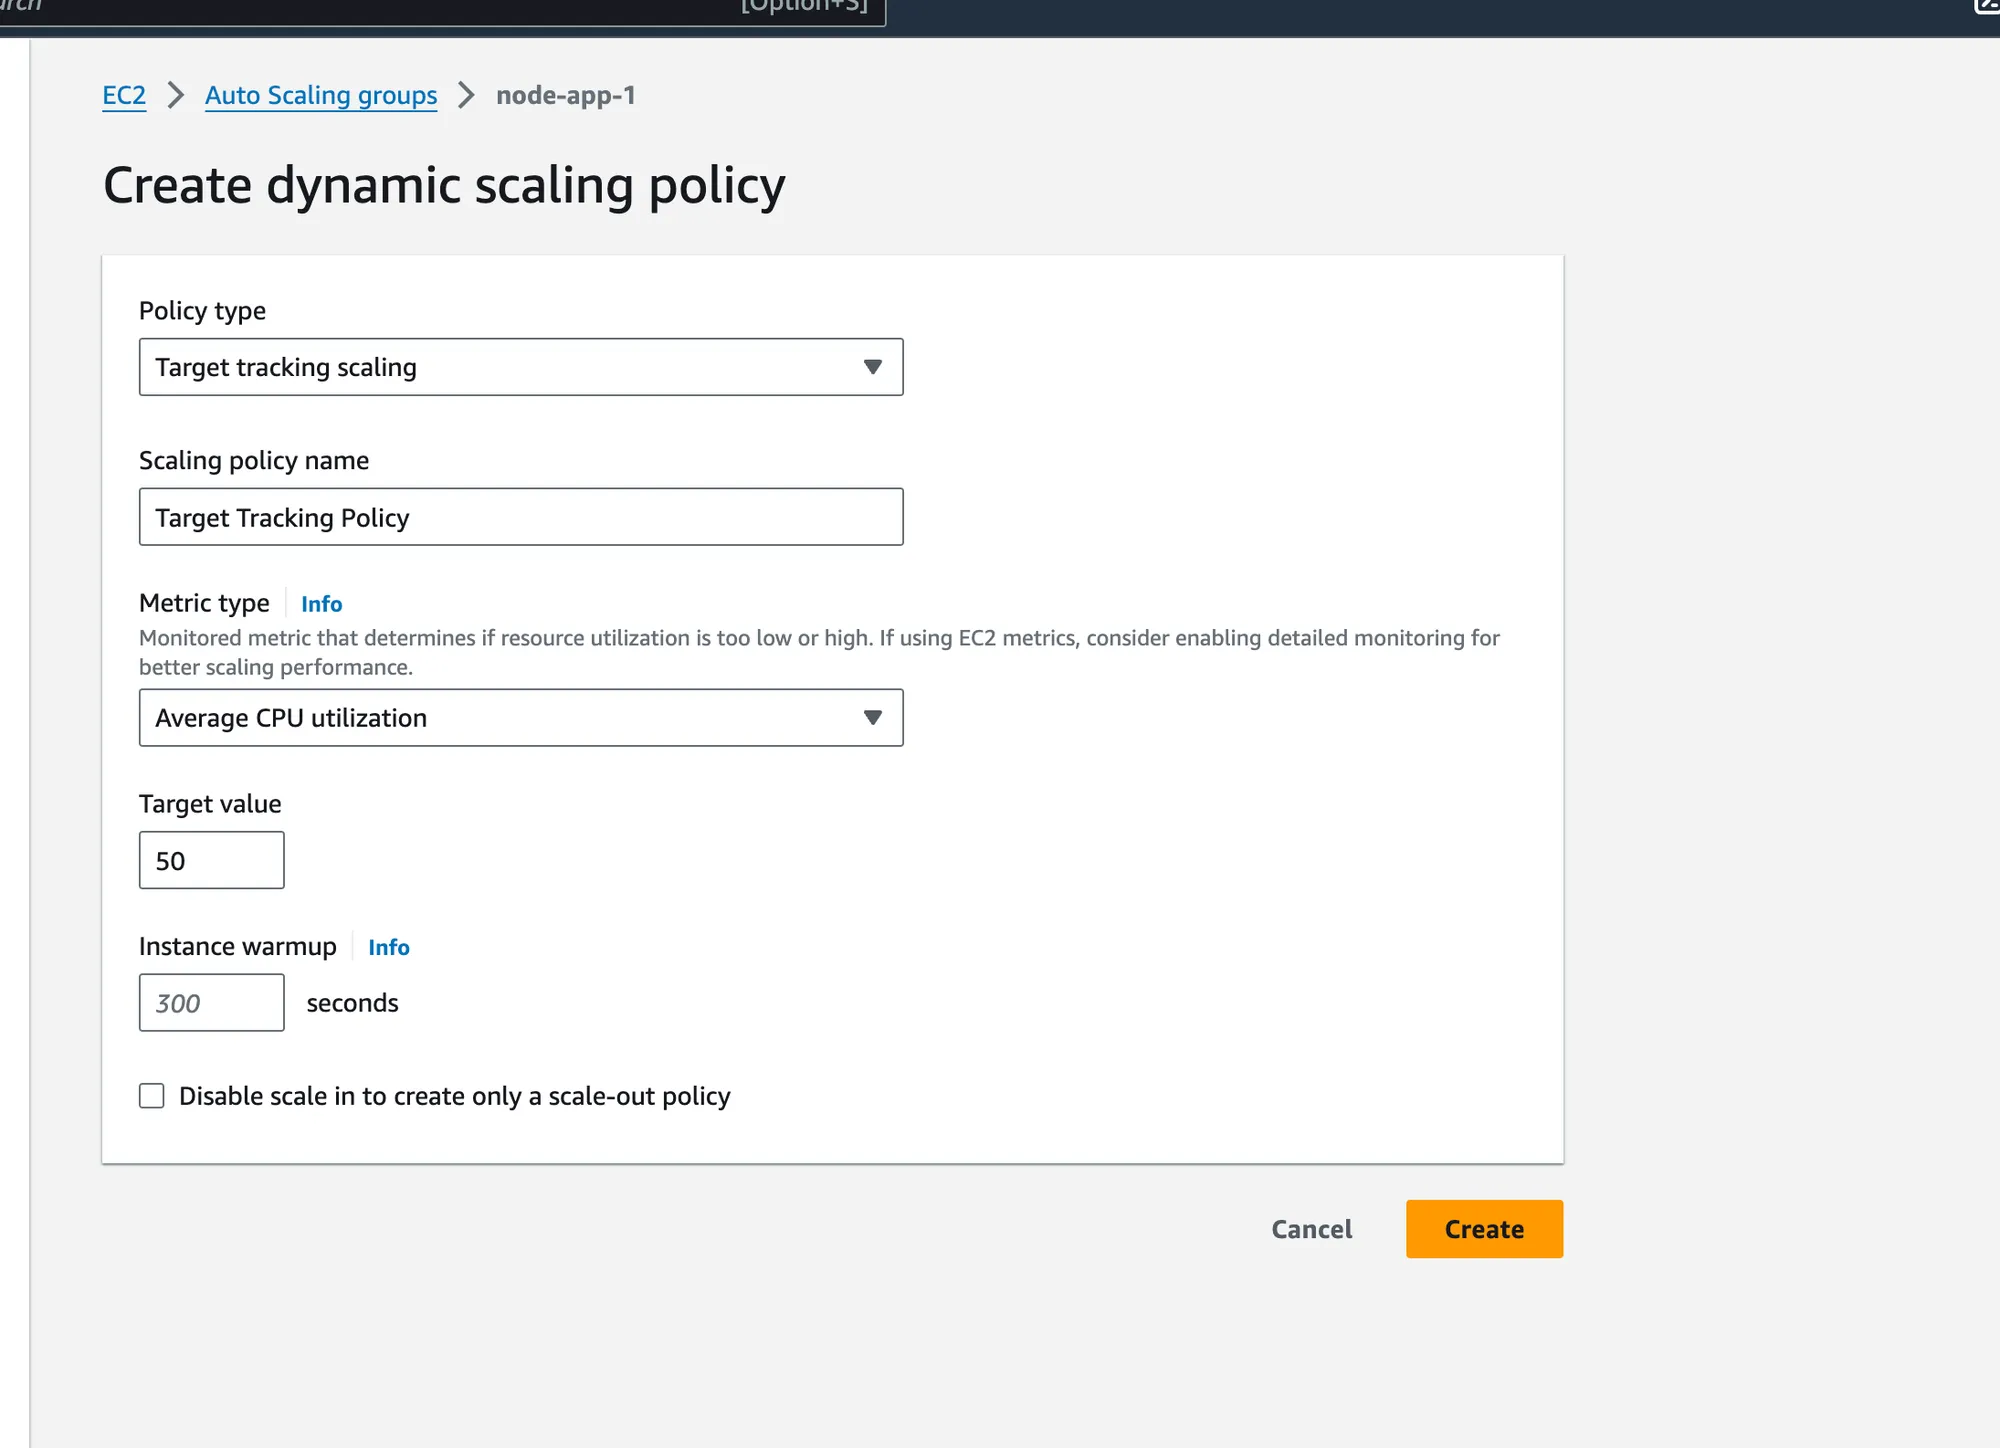
Autoscaling Policies
- You can create dynamic scaling policies based on various metrics, such as CPU utilization, network traffic, or custom metrics.
- Scaling policies define the conditions under which instances are added or removed from the ASG.
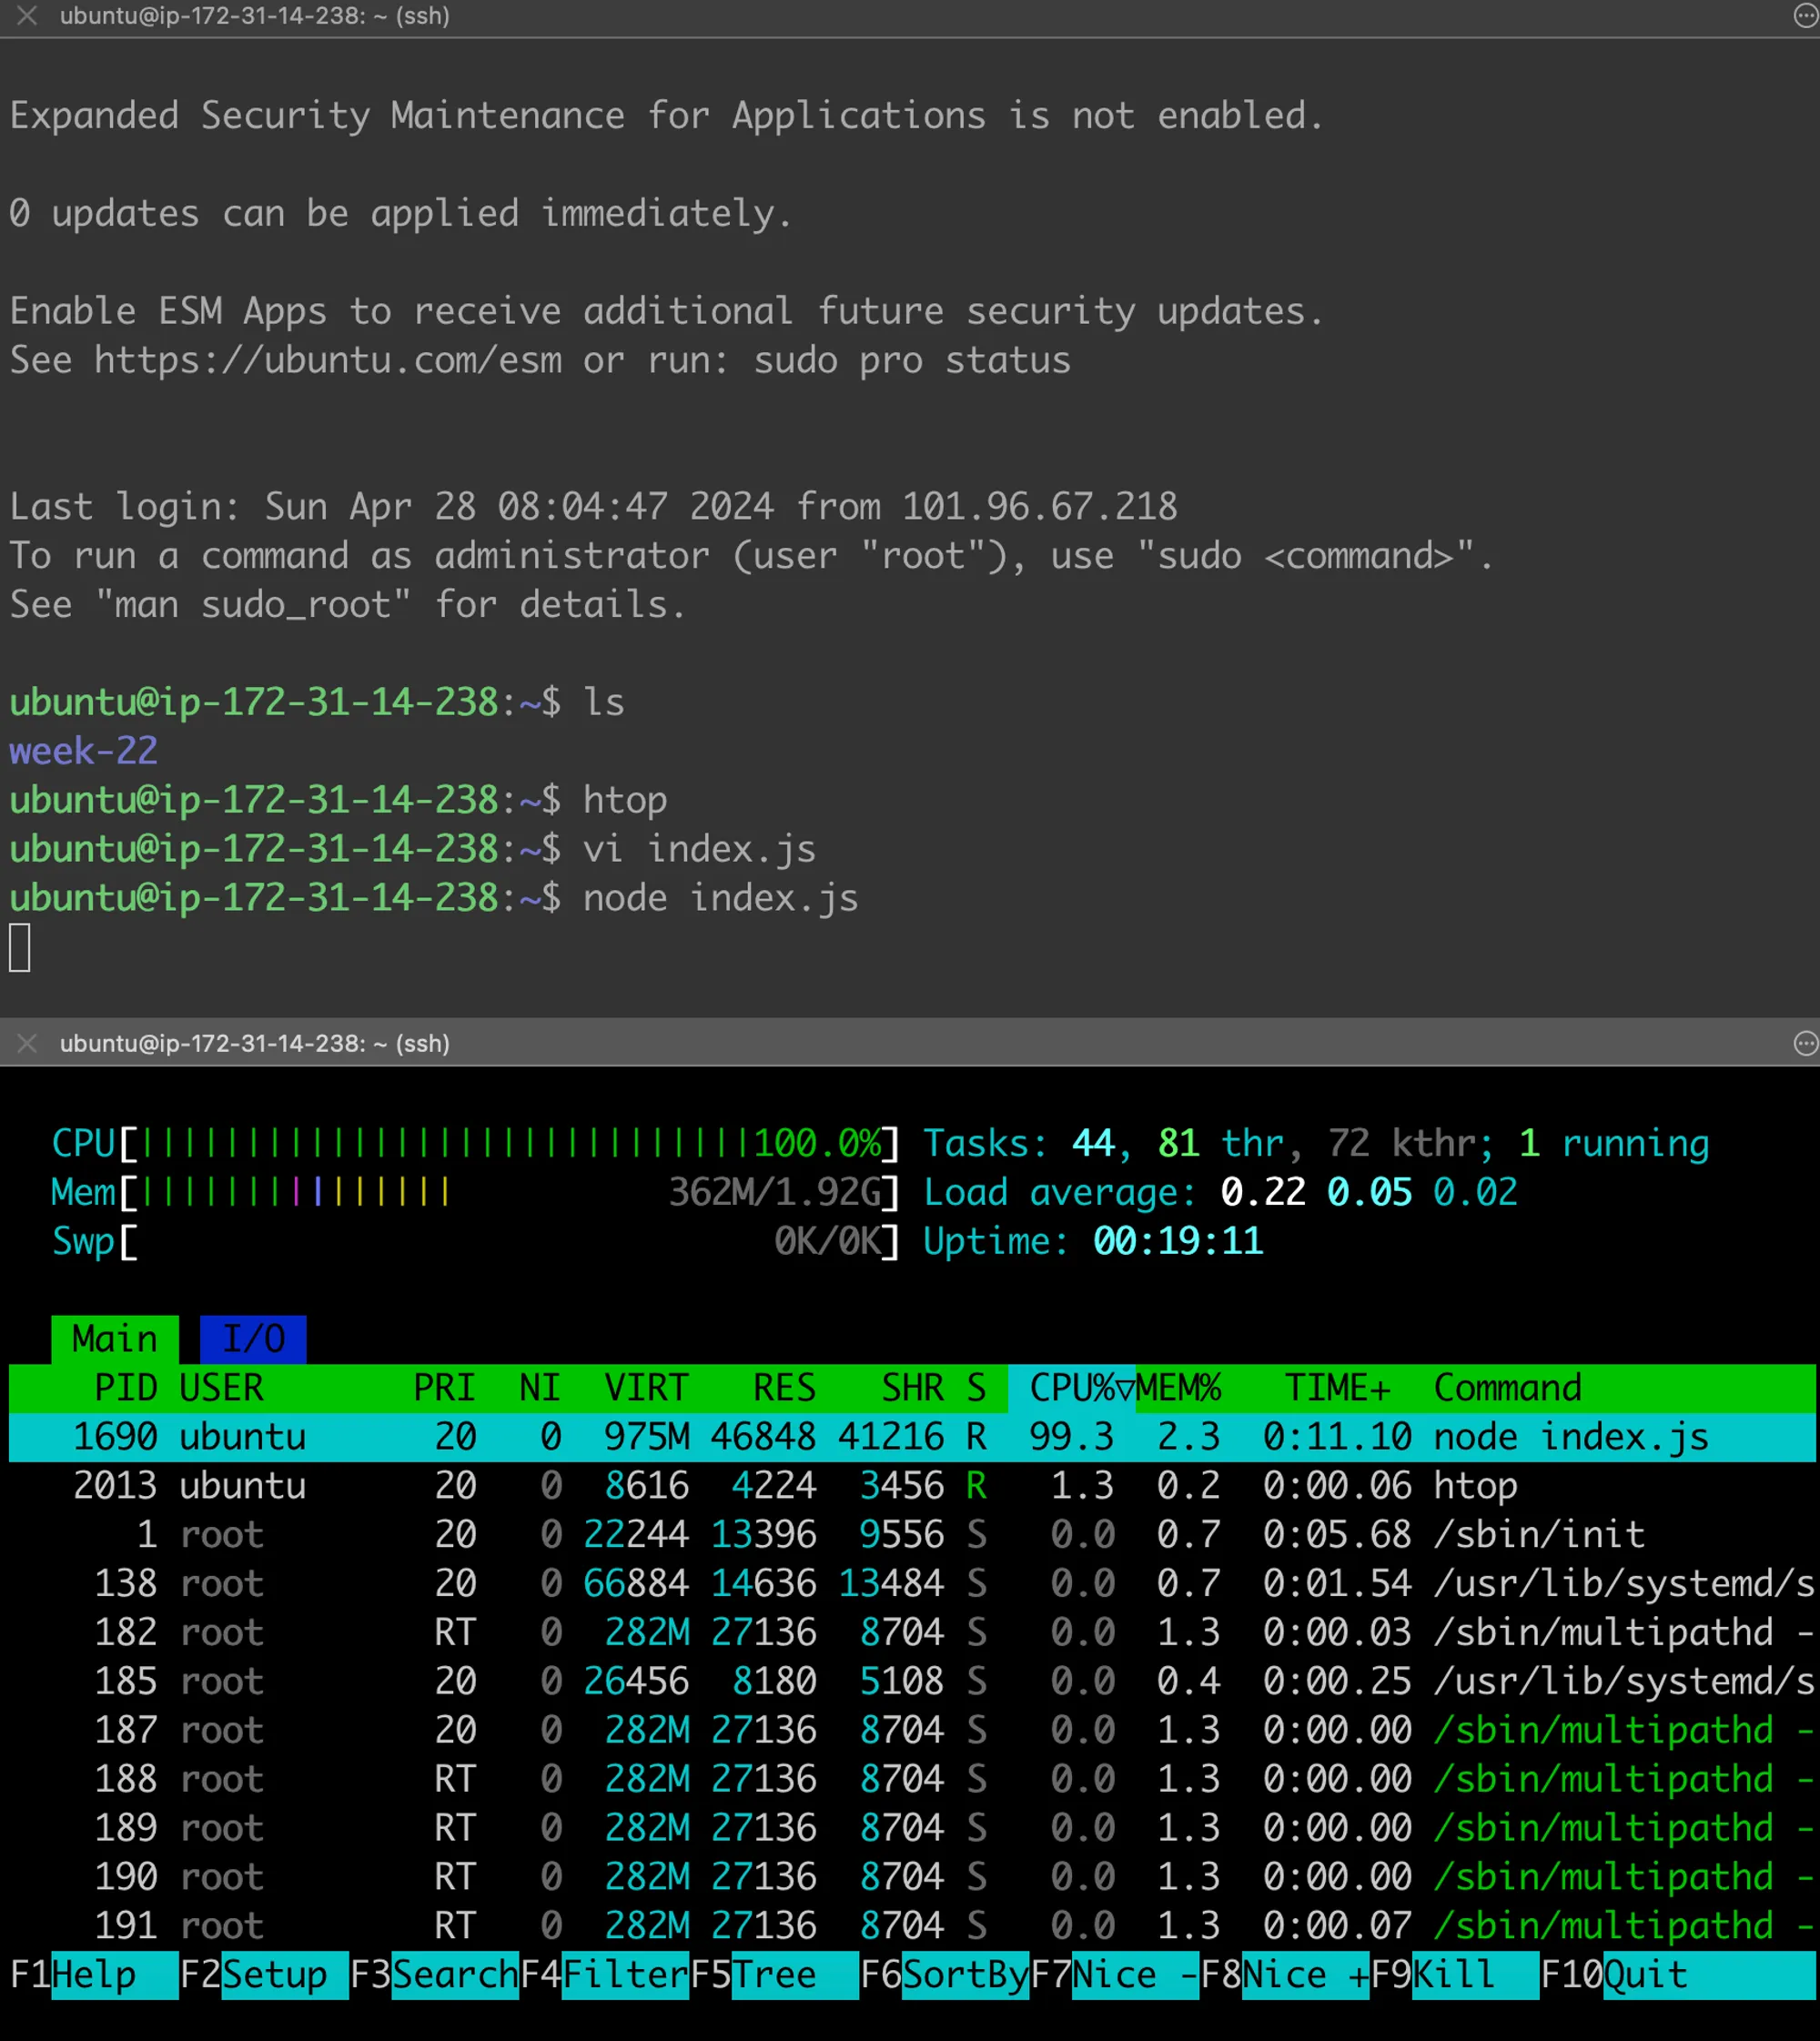
Testing Autoscaling
- Try changing the minimum and maximum instance counts in your ASG to observe the scaling behavior.
- Simulate a scale-up event by running an infinite loop on one of the instances to increase CPU utilization:
let c = 0;
while (1) { c++;}- You’ll notice the desired capacity goes up by one in some time.
- Try turning the infinite loop off and notice a scale-down event happening after a cool-down period.
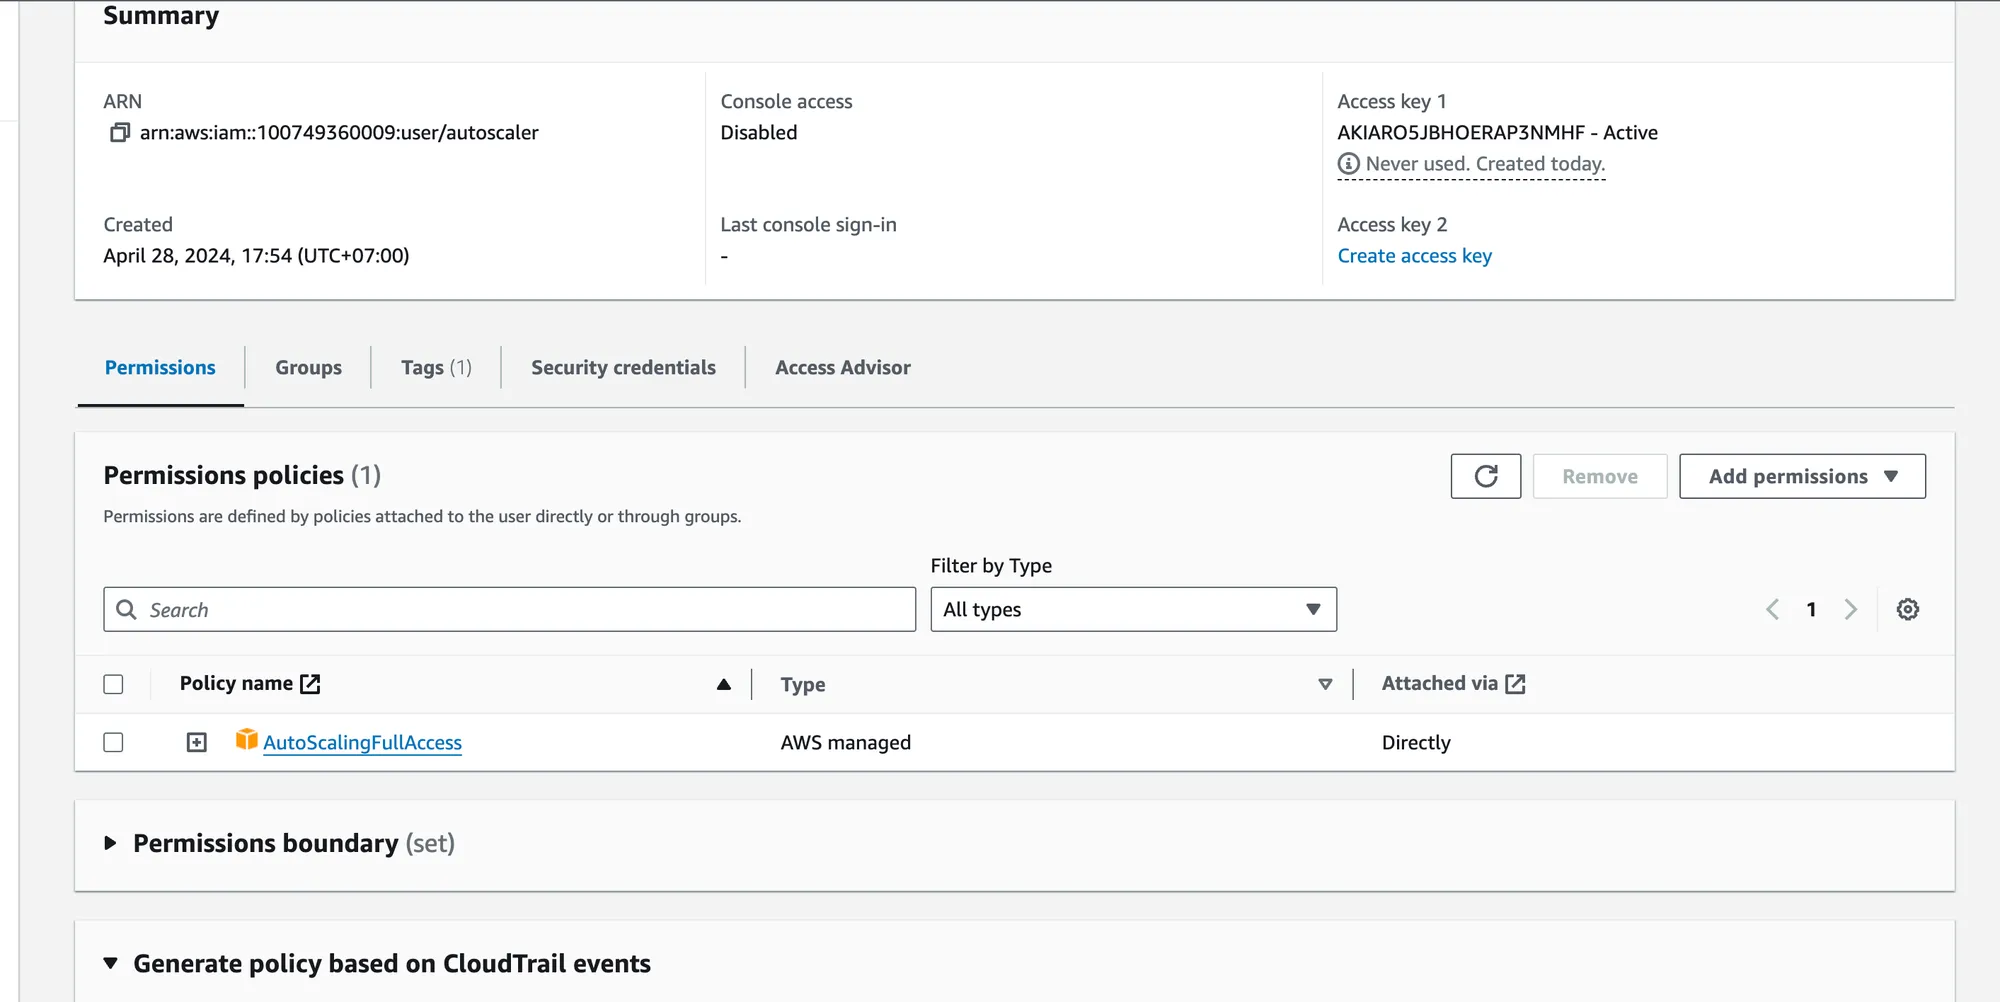
Scaling via a Node.js Application
- Create an IAM user with the
AutoScalingFullAccesspolicy attached. - Use the AWS SDK for Node.js to interact with the Auto Scaling service programmatically:
import AWS from 'aws-sdk';
AWS.config.update({  region: 'ap-south-1',  accessKeyId: 'YOUR_ACCESS_KEY',  secretAccessKey: 'YOUR_ACCESS_SECRET'});
// Create an Auto Scaling clientconst autoscaling = new AWS.AutoScaling();
// Function to update the desired capacity of an Auto Scaling groupconst updateDesiredCapacity = (autoScalingGroupName, desiredCapacity) => {  const params = {    AutoScalingGroupName: autoScalingGroupName,    DesiredCapacity: desiredCapacity  };
  autoscaling.setDesiredCapacity(params, (err, data) => {    if (err) {      console.log("Error", err);    } else {      console.log("Success", data);    }  });};
// Example usageconst groupName = 'node-app-1'; // Set your Auto Scaling group nameconst newDesiredCapacity = 3; // Set the new desired capacity
// Call the functionupdateDesiredCapacity(groupName, newDesiredCapacity);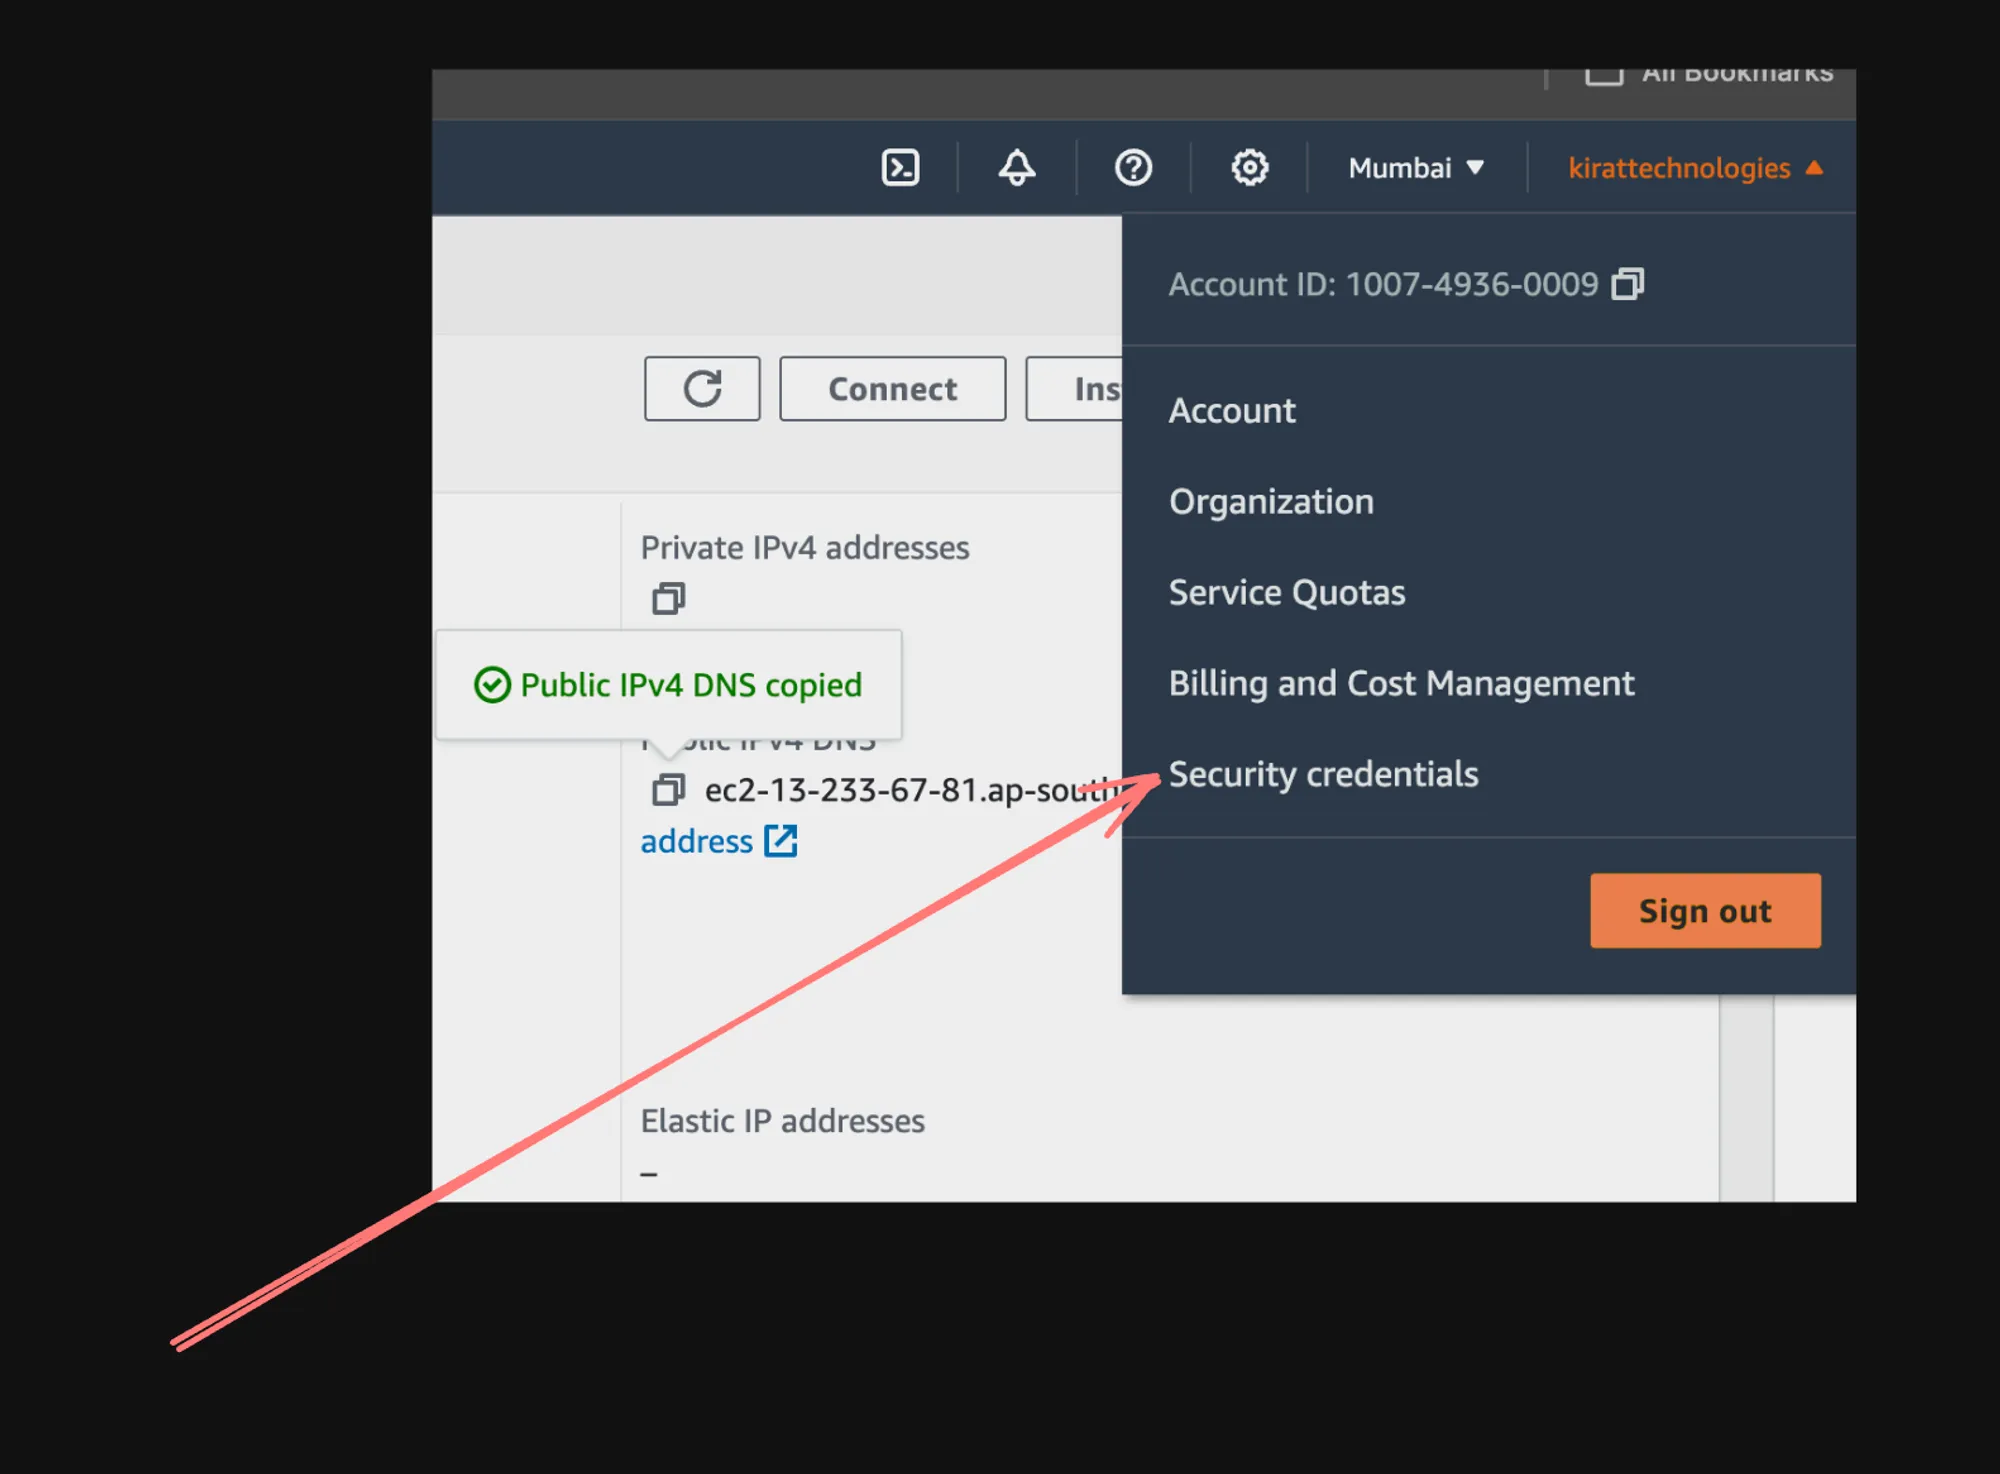
Cleanup
When you’re done testing and experimenting, remember to clean up the resources you created:
- Delete the Auto Scaling group
- Delete the target group
- Delete the load balancer
- Delete the launch template
- Delete the AMI
- Terminate any remaining EC2 instances
Elastic Beanstalk Considerations
- Elastic Beanstalk provides a more streamlined and managed approach to deploying and scaling web applications.
- It abstracts away many of the underlying infrastructure details, making it easier to get started and manage your application lifecycle.
- However, it may offer less control and customization compared to manually setting up and configuring individual AWS resources.
By following this detailed guide, you’ll gain hands-on experience in setting up and using Auto Scaling Groups in AWS, as well as understanding the benefits and trade-offs of using Elastic Beanstalk.